ADVERTISEMENT
Step-by-Step Guide to Cleaning Your Oven
Step 1: Empty the Oven
Before you begin cleaning, remove any racks, trays, or other items from the oven. This will give you full access to the oven’s interior and make the cleaning process easier.
Step 2: Make a Baking Soda Paste
In a small bowl, mix baking soda with a small amount of water to create a thick paste. The consistency should be spreadable but not too runny. You can adjust the amount of water to get the right consistency, but you’ll need enough baking soda to cover the entire oven surface.
Step 3: Apply the Baking Soda Paste
With a spatula or your hands (wear gloves for protection), apply the baking soda paste generously to the interior surfaces of the oven. Focus on areas with heavy grease or buildup, such as the oven floor, walls, and door. Avoid applying the paste to the heating elements.
Once the oven is coated, close the door and let the baking soda paste sit for at least 12 hours or overnight. This will give it time to break down the grime and grease, making it easier to wipe away.
Step 4: Spray with Vinegar
After the waiting period, take a spray bottle and fill it with white vinegar and water in a 1:1 ratio. Spray the vinegar solution directly over the baking soda paste. You’ll notice that the baking soda will start to fizz as it reacts with the vinegar. This reaction helps lift the grime and grease from the oven surfaces.
Let the vinegar and baking soda sit together for about 15-30 minutes, allowing the foam to work its magic.
Step 5: Wipe Down the Oven
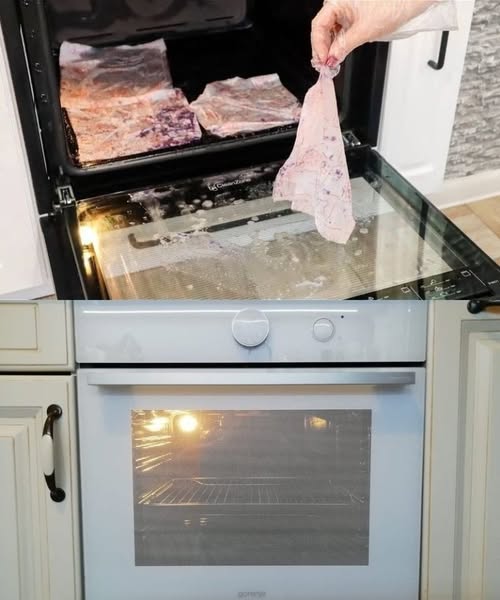
Once the baking soda and vinegar have had time to work, use a damp microfiber cloth or sponge to wipe down the oven. You’ll notice that the grime should come off much more easily than it did before. For any remaining tough spots, you can use a spatula to gently scrape off the residue.
Step 6: Clean the Racks
While the oven is soaking, you can clean the racks. Soak them in hot water with a bit of dish soap for a couple of hours, then scrub them with a brush to remove any grease or debris. Once clean, rinse and dry them before putting them back in the oven.
Step 7: Final Wipe and Shine
After you’ve wiped down all the surfaces, give the oven one last wipe with a clean, damp microfiber cloth to remove any lingering baking soda or vinegar residue. You can dry the surfaces with a towel if needed.
Tips for Success
- Regular Maintenance: To keep your oven looking clean longer, give it a quick wipe-down with a damp cloth after each use to prevent grease buildup.
- Tough Stains: For extra-tough stains, apply more baking soda paste and let it sit longer. You can even increase the vinegar-to-water ratio for tougher messes.
- Ventilation: Ensure your kitchen is well-ventilated while cleaning, especially if you use vinegar, as the strong smell can be overwhelming.
- Avoid Harsh Chemicals: This method is a great alternative to commercial oven cleaners, which can often contain harsh chemicals that are harmful to your health.
Benefits of Using This Method
- Non-Toxic: Baking soda and vinegar are natural and safe, meaning no harsh chemicals will be exposed to your family or pets.
- Cost-Effective: This method uses items you likely already have at home, saving you money on expensive oven cleaning products.
- Environmentally Friendly: By using eco-friendly ingredients, you’re reducing your carbon footprint and avoiding the disposal of toxic chemicals.
- Easy and Efficient: The process is simple, effective, and requires minimal effort. It also saves time compared to scrubbing for hours with harsh cleaners.
Conclusion
Transform your oven cleaning experience with this simple yet powerful method that combines the natural power of baking soda and vinegar. Not only does it provide a deep clean, but it also helps you avoid toxic chemicals, saving time and money. With this easy trick, your oven will be sparkling clean and ready for your next cooking adventure – all with minimal effort and no harsh fumes. Say goodbye to tedious scrubbing and hello to a fresh, shiny oven!
ADVERTISEMENT
ADVERTISEMENT
