ADVERTISEMENT
Instructions:
1. Heat the Milk:
Pour the whole milk into a pot and place it over medium heat. Slowly heat the milk, stirring occasionally to prevent it from scalding or forming a skin. Heat the milk to 190°F (88°C), just below boiling. At this point, the milk will begin to show signs of simmering, and you’ll see steam rising from the pot.
2. Add Vinegar:
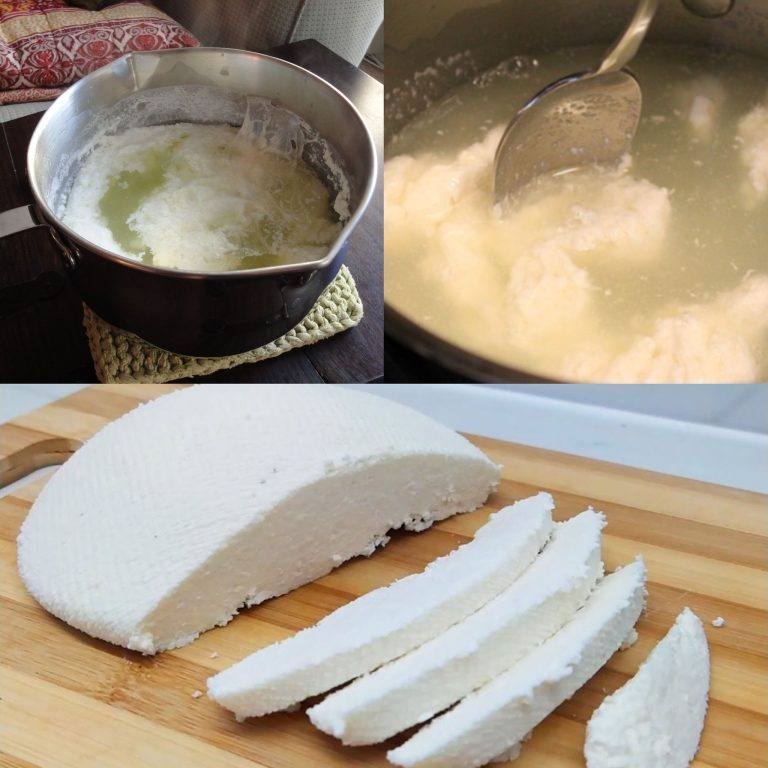
Once the milk has reached 190°F, turn off the heat. Add the vinegar to the milk and stir gently for a few seconds. The vinegar will start to curdle the milk, causing it to separate into curds (the solid part) and whey (the liquid part). Let the mixture sit undisturbed for 10-15 minutes. You’ll see the curds clump together, and the whey will be a clear, yellowish liquid.
3. Drain the Curds:
Place a colander or strainer over a bowl and line it with a clean kitchen towel or cheesecloth. Gently ladle the curds and whey into the colander, allowing the liquid to drain away. Let the curds sit in the colander for a few minutes to remove excess liquid. If you prefer a firmer cheese, you can let it drain longer. You can save the whey for other recipes like smoothies or baking—it’s full of nutrients!
4. Season the Cheese:
Once most of the liquid has drained, you can add salt to taste. This step is optional, but it enhances the flavor of the cheese. Gently mix the salt into the curds with a spoon.
5. Shape the Cheese:
You can leave the cheese as-is for a rustic, crumbly texture, or you can shape it into a ball or log using your hands or the cheesecloth. If you want to make the cheese firmer, wrap it in the cheesecloth and press it gently to expel any remaining liquid. The longer you press, the firmer the cheese will be.
6. Chill (Optional):
For a firmer texture, you can place the cheese in the fridge for about an hour to firm up. However, if you’re in a hurry, you can enjoy it right away! The cheese can be stored in the fridge for a few days.
Tips for Success
- Milk Temperature: Be careful not to let the milk boil. If the milk gets too hot (over 200°F), it can affect the curdling process and the texture of your cheese.
- Use Fresh Vinegar: Make sure your vinegar is fresh and hasn’t been sitting around for too long. Old vinegar might not work as effectively in curdling the milk.
- Experiment with Flavors: You can add herbs, spices, or garlic to your cheese to give it unique flavors. Try adding dried oregano, basil, or crushed red pepper flakes to the curds before pressing for a custom-flavored cheese.
- Use Whole Milk for Best Results: For a creamier and richer cheese, always opt for whole milk. Skim or low-fat milk may not produce the same creamy texture.
What Kind of Cheese Is This?
This simple cheese recipe is more akin to a fresh cheese or paneer, similar to what you might find in dishes from Indian or Middle Eastern cuisines. It has a mild flavor and a soft, crumbly texture. While it may not have the aging process of aged cheeses like cheddar or gouda, this fresh cheese is perfect for using in salads, sandwiches, pasta dishes, or just eating on its own with crackers.
You can also experiment with the process to create ricotta by using a higher quantity of milk and allowing the curds to form more gently, resulting in a soft, creamy cheese.
Why You Should Try Making Your Own Cheese
Making your own cheese with just milk and vinegar is an incredibly rewarding experience. It not only allows you to enjoy fresh cheese whenever you want, but it also empowers you to experiment and customize your cheese to fit your taste preferences. Plus, making cheese at home is a fun way to get more involved in your cooking, whether you’re a seasoned chef or a home cook just starting out.
If you’re tired of paying a premium for store-bought cheese and want to embrace the joy of homemade food, this recipe is for you. So, gather your milk and vinegar, get your pot ready, and try making your own cheese today—it’s easier than you think, and you’ll be amazed at the results!
Conclusion
With just milk and vinegar, you can create delicious, fresh cheese at home without any complicated tools or special ingredients. By following these simple steps, you can enjoy the satisfaction of homemade cheese and save money in the process. Whether you’re looking to make cheese for a recipe or simply want to enjoy it as a snack, this easy method will give you a fresh, flavorful result. Happy cheesemaking!
ADVERTISEMENT
