ADVERTISEMENT
Instructions
1. Prepare the Dry Ingredients
In a large mixing bowl, combine the all-purpose flour, baking powder, and salt. If you’re adding any dried herbs or sugar for a sweet version, mix those in as well.
2. Add the Wet Ingredients
Make a well in the center of your dry ingredients and add the milk, olive oil (or melted butter), and any optional sweetener like honey. Stir everything together using a spoon or spatula until the dough starts to come together. You should have a soft, slightly sticky dough, but not too wet.
3. Form the Dough
Once everything is combined, lightly flour your countertop or work surface. Turn the dough out onto the surface and gently knead it a few times (just a few folds, no need to overwork it) until it forms a smooth ball. If the dough is too sticky, sprinkle in a little more flour, but be careful not to add too much.
4. Shape the Dough
Flatten the dough into a round or oval shape, depending on the shape of your skillet or pan. Aim for about 1-inch thickness—this will help the bread cook evenly.
5. Cook the Bread
Heat a large skillet or heavy-bottomed pan over medium-low heat. Add a little bit of oil to the pan, just enough to coat the bottom. Place your shaped dough into the pan.
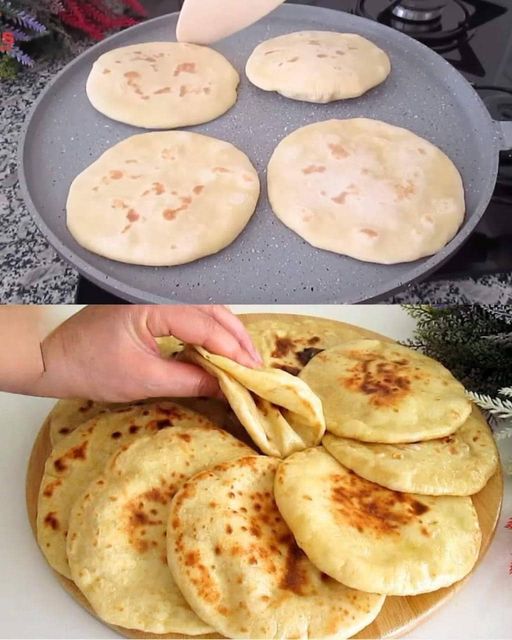
Cover the skillet with a lid and cook for about 5-7 minutes on one side. You want to keep the heat low to avoid burning the bread while it cooks through. After about 5-7 minutes, carefully flip the bread over and cook for another 5-7 minutes on the other side.
6. Check for Doneness
The bread should be golden brown on both sides and cooked all the way through. You can check for doneness by inserting a toothpick or skewer into the center of the bread—it should come out clean. If the bread is still raw in the middle, lower the heat and cook it for another 2-3 minutes on each side.
7. Serve and Enjoy
Once the bread is cooked, remove it from the skillet and place it on a wire rack to cool slightly. Slice and serve as is or with your favorite spreads, cheeses, or fillings. You can also toast it lightly for an extra crispy bite!
Tips for Perfect No-Oven Bread
- Control the Heat: The key to getting this bread perfectly cooked without an oven is to cook it over medium-low heat. Too high, and the bread will burn on the outside before the inside is cooked. Too low, and it might take longer than necessary. A steady, moderate temperature is ideal.
- Try Different Flavors: This bread is wonderfully versatile. Add dried herbs like rosemary, thyme, or oregano for a savory twist, or mix in some garlic powder and cheese for a cheesy bread option. You can even stir in raisins or a bit of cinnamon for a sweet treat.
- Use a Heavy-Bottomed Pan: For even cooking, it’s important to use a heavy skillet or pan. A cast-iron skillet works especially well, as it retains heat and evenly distributes it, ensuring the bread cooks perfectly.
- Don’t Overwork the Dough: Since this recipe doesn’t require any kneading, be gentle with the dough to avoid dense bread. Mixing it just until combined and folding it a couple of times will yield a soft, fluffy result.
- Serve Immediately or Store: While this bread is best served fresh, you can store leftovers in an airtight container for 2-3 days. For a warm snack, just pop it in the toaster for a few seconds.
Why This No-Oven Bread Recipe Is Perfect
This Quick and Easy No-Oven Bread recipe is a game-changer for anyone who loves fresh bread but doesn’t have the time (or inclination) to bake in the oven. It’s simple, fast, and doesn’t require any special equipment—just a skillet and a few pantry ingredients.
The bread has a soft, slightly chewy texture and a lovely golden-brown crust, making it perfect for everything from sandwiches to serving as a side with soups or salads. You can even top it with your favorite spreads or make a savory or sweet variation based on what you have in the kitchen.
Final Thoughts
Whether you’re a seasoned baker or a beginner, this no-oven bread recipe is an excellent way to enjoy homemade bread in a fraction of the time it takes for traditional recipes. It’s easy, versatile, and perfect for those days when you need fresh bread without the oven. With just a few simple ingredients and minimal time, you can have a warm, satisfying loaf of bread ready in no time.
Give this quick and easy bread recipe a try—you’ll be amazed at how simple and delicious homemade bread can be!
ADVERTISEMENT
ADVERTISEMENT
