ADVERTISEMENT
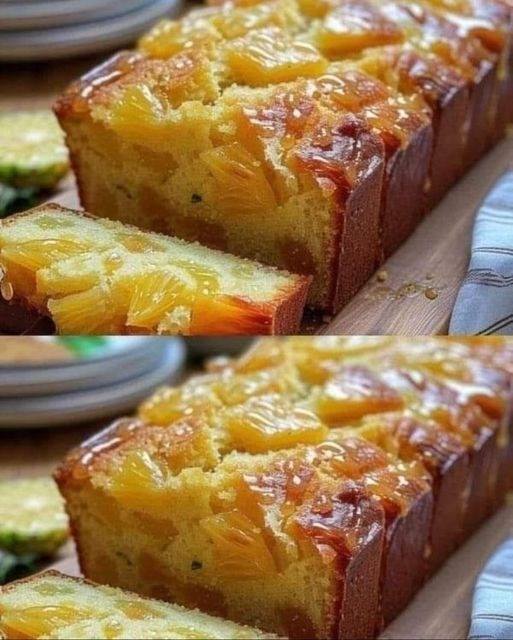
Title: Pineapple Quick Bread: A Deliciously Moist and Easy Recipe
When it comes to quick breads, few are as delightful and refreshing as a slice of pineapple quick bread. With its tropical sweetness and moist crumb, this easy-to-make bread is a perfect treat for any occasion. Whether you’re looking for a breakfast pastry, an afternoon snack, or a light dessert, pineapple quick bread delivers in both flavor and texture, making it a versatile option for any time of day.
What makes pineapple quick bread so special is its combination of bright, juicy pineapple with the familiar comfort of homemade bread. Unlike traditional yeast bread, quick bread uses baking soda or baking powder as a leavening agent, which means no rising time is required. This makes the recipe not only quick to prepare but also a great option for beginners or anyone in need of a last-minute treat.
In this article, we’ll dive into the step-by-step process of making this delicious bread, explore its variations, and share some tips to ensure your pineapple quick bread comes out perfectly every time.
Why You’ll Love Pineapple Quick Bread
Pineapple quick bread is a winner for several reasons:
- Moist and Flavorful: The addition of pineapple makes this bread incredibly moist, while the sweetness of the fruit pairs perfectly with the subtle hints of vanilla and cinnamon.
- Simple Ingredients: You don’t need to be a seasoned baker to pull this off. With just a handful of simple ingredients, including canned or fresh pineapple, you can make this bread in no time.
- Versatile and Customizable: While the classic pineapple quick bread is already delicious, it’s easy to make adjustments to suit your tastes. Add-ins like nuts, coconut flakes, or chocolate chips can elevate the flavor profile.
- Perfect for Sharing: Whether you’re hosting a brunch, bringing a dish to a potluck, or just want a special homemade gift, this bread is sure to impress. It’s also a great snack to enjoy with a cup of coffee or tea.
Pineapple Quick Bread Recipe
Ingredients
- 1 cup crushed pineapple (drained well)
- 1 ¾ cups all-purpose flour
- 1 teaspoon baking powder
- 1 teaspoon baking soda
- ½ teaspoon salt
- ½ teaspoon ground cinnamon (optional, but adds warmth)
- 1 cup granulated sugar
- ½ cup unsalted butter, softened
- 2 large eggs
- 1 teaspoon vanilla extract
- ½ cup buttermilk (or substitute with milk and a tablespoon of lemon juice)
- 1/2 cup chopped nuts or shredded coconut (optional)
Instructions
Step 1: Preheat the Oven
- Preheat your oven to 350°F (175°C). Grease and flour a 9×5-inch loaf pan or line it with parchment paper for easy removal of the bread once it’s baked.
Step 2: Prepare the Wet Ingredients
- In a large mixing bowl, beat the softened butter and sugar together until light and fluffy, about 2-3 minutes.
- Add in the eggs, one at a time, beating well after each addition. Stir in the vanilla extract.
- Mix in the crushed pineapple, making sure to drain it well to prevent excess moisture in the batter. You can save the juice for another use (such as smoothies or as a flavoring for beverages).
Step 3: Combine the Dry Ingredients
- In a separate bowl, whisk together the flour, baking powder, baking soda, salt, and cinnamon (if using).
- Gradually add the dry ingredients to the wet ingredients, alternating with the buttermilk. Begin and end with the dry ingredients to ensure everything is evenly mixed. Be careful not to overmix, as this can lead to a dense texture.
Step 4: Add Optional Ingredients
- If you want to add nuts or coconut flakes for extra texture and flavor, fold them in gently at this point.
Step 5: Bake
- Pour the batter into the prepared loaf pan and smooth the top with a spatula.
- Bake for 60-70 minutes or until a toothpick inserted into the center comes out clean. Every oven is different, so start checking around the 55-minute mark to ensure the bread doesn’t overbake.
Step 6: Cool and Serve
- Once baked, remove the bread from the oven and let it cool in the pan for 10 minutes before transferring it to a wire rack to cool completely.
- Slice the bread once it has cooled and serve. Enjoy as-is, or with a pat of butter or a drizzle of honey for added sweetness.
For Complete Cooking STEPS Please Head On Over To Next Page Or Open button (>) and don’t forget to SHARE with your Facebook friends
ADVERTISEMENT
