ADVERTISEMENT
Directions:
Step 1: Prepare the Oreo Crust
Start by making the Oreo crust. Place 24 Oreo cookies (whole) into a food processor or blender and pulse until the cookies are broken down into fine crumbs. If you don’t have a food processor, you can place the cookies in a large plastic bag and crush them with a rolling pin.
Once you have your cookie crumbs, transfer them to a bowl and mix in the 5 tablespoons of melted butter. Stir until the mixture is fully combined and resembles wet sand.
Next, press the crumb mixture into the bottom and up the sides of a 9-inch pie pan. Use the back of a spoon or the bottom of a glass to firmly pack the crumbs, creating an even crust. Refrigerate the crust for at least 15-20 minutes to allow it to set and firm up.
Step 2: Make the Creamy Filling
While the crust is chilling, prepare the creamy filling. In a large mixing bowl, beat the softened cream cheese with an electric mixer on medium speed until smooth and creamy, about 1-2 minutes. Add the powdered sugar and vanilla extract, and continue to beat until well combined.
In a separate bowl, use an electric mixer to whip the 1 cup of heavy whipping cream until soft peaks form. You want the whipped cream to be thick, but not too stiff. Once whipped, gently fold the whipped cream into the cream cheese mixture, mixing until smooth and combined. Be careful not to deflate the whipped cream too much.
For an extra touch of chocolate flavor, fold in mini chocolate chips if desired. This will give your pie a bit of extra texture and a burst of chocolate in every bite.
Step 3: Assemble the Pie
Once your Oreo crust has chilled and your filling is ready, it’s time to assemble the pie.
Pour the cream cheese mixture into the prepared Oreo crust, spreading it evenly with a spatula. Smooth the top of the pie for a neat finish.
Cover the pie with plastic wrap or foil and refrigerate for 4 hours or overnight to allow it to set properly. The longer it chills, the better the flavors will meld together, and the filling will firm up for a perfect slice.
Step 4: Whip the Topping
Before serving, prepare the whipped topping. In a clean mixing bowl, whip 1/2 cup of heavy whipping cream and 2 tablespoons of powdered sugar until soft peaks form. This whipped cream will add a light, airy finish to the pie.
Spread the whipped cream on top of the chilled pie, smoothing it out evenly with a spatula. For an extra touch of flavor and texture, sprinkle crushed Oreos over the top of the whipped cream. You can use a few whole Oreos for decoration or crush some extra cookies for a more decadent topping.
Step 5: Serve and Enjoy
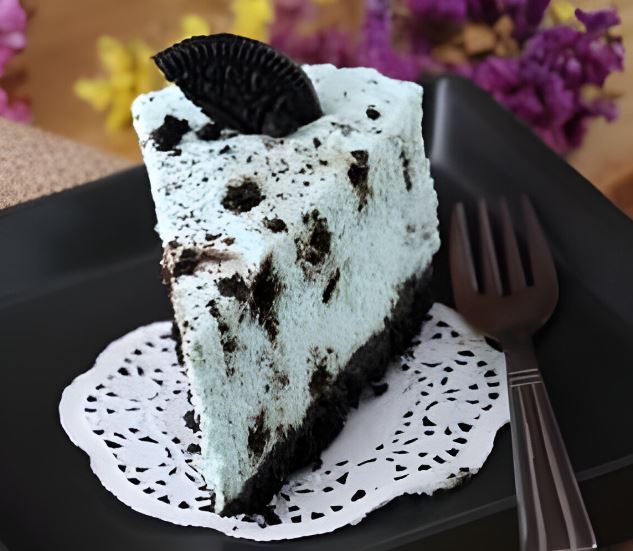
Once the pie is topped, slice and serve. The No-Bake Oreo Cream Pie is best served chilled, and the combination of the rich, creamy filling with the crunchy Oreo crust will leave everyone asking for seconds!
Why You’ll Love No-Bake Oreo Cream Pie:
- Effortless to Make: No need to bake anything. Simply prepare the crust, mix the filling, assemble, chill, and enjoy! It’s a dessert that requires minimal time and effort but delivers maximum flavor.
- Perfect for Any Occasion: Whether you’re hosting a dinner party, having a summer BBQ, or just craving something sweet, this pie is sure to be a hit with both kids and adults. It’s perfect for birthdays, holidays, or simply as an everyday treat.
- Rich and Creamy: The creamy, smooth filling paired with the crunchy Oreo crust creates a perfect contrast of textures. Plus, the addition of whipped cream on top makes each bite feel light and indulgent.
- Customizable: Feel free to get creative with your pie! You can mix in different types of cookies, add a layer of chocolate ganache, or even top the pie with fruit like raspberries or strawberries for a fresh twist.
- Make-Ahead Convenience: This dessert can be made a day or two ahead of time, making it an excellent choice for busy days or gatherings when you need to prep ahead. Just make sure it has enough time to chill and set properly.
Final Thoughts
The No-Bake Oreo Cream Pie is the perfect dessert for anyone who loves the combination of cookies and cream. With its creamy filling, crunchy Oreo crust, and fluffy whipped cream topping, this dessert is a treat that’s as easy to make as it is to enjoy. Whether you’re serving it at a family gathering or treating yourself to something sweet, this no-bake pie will quickly become a favorite go-to recipe. So, grab a package of Oreos, whip up the filling, and enjoy a slice of pure dessert bliss!
ADVERTISEMENT
