ADVERTISEMENT
Step-by-Step Instructions
- Heat the Milk
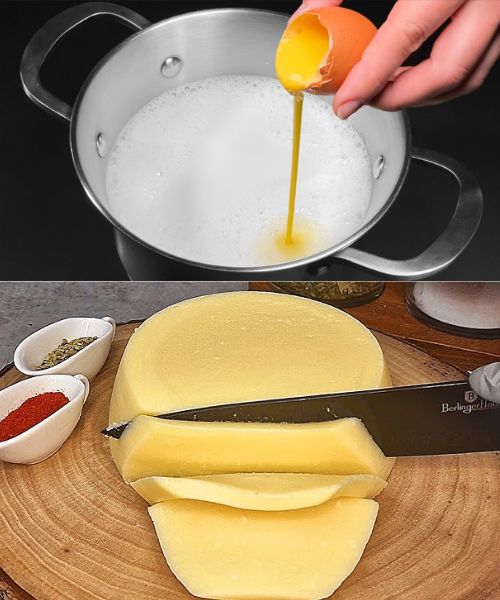
Pour the milk into a heavy-bottomed saucepan and heat it over medium heat. Stir occasionally to prevent the milk from sticking to the bottom. Heat until it’s just about to boil, but don’t let it boil over (around 85°C or 185°F if you have a thermometer). - Add the Acid
Once the milk is hot, remove it from the heat and add the vinegar or lemon juice. Stir gently for a few seconds. You’ll notice the milk curdling as the acid separates the curds (solid part) from the whey (liquid part). - Let it Sit
Cover the pot and let it sit for about 10 minutes. This allows the curds to fully separate from the whey. - Strain the Curds
Place a cheesecloth or clean kitchen towel over a colander and set it in a large bowl or sink. Pour the curdled milk mixture into the cheesecloth. Let the whey drain for 5-10 minutes. - Season the Cheese
After the whey has drained, gather the cheesecloth corners and gently squeeze out any remaining liquid. Transfer the curds to a bowl and mix in a pinch of salt. You can also add herbs or spices if you like. - Shape and Chill
For a firmer cheese, press the curds into a mold or small container lined with cheesecloth. Cover and refrigerate for at least an hour to let it set. If you prefer a softer cheese, you can enjoy it right away!
Customization Tips
- Add Flavor: Mix in fresh herbs like parsley, chives, or basil for a gourmet touch. You can also add crushed garlic, black pepper, or a dash of chili flakes for extra flavor.
- Use Different Acids: Experiment with different acids, like apple cider vinegar or lime juice, to slightly vary the taste.
- Try Non-Dairy Milk: Use nut milk or soy milk if you prefer a vegan version, though the process may require a thickening agent like agar-agar.
What to Do with the Whey
Don’t throw away the whey! It’s full of protein and nutrients. Use it in:
- Smoothies
- Baking bread or pancakes
- Soups and stews as a flavorful base
Why Make Cheese at Home?
- Healthier Option: No preservatives, artificial colors, or unnecessary additives.
- Customizable: Tailor the flavor, texture, and seasoning to your liking.
- Budget-Friendly: Making cheese at home is cost-effective, especially if you already have the ingredients on hand.
- Sustainable: Reduces packaging waste from store-bought cheese.
Serving Suggestions
Homemade cheese is incredibly versatile. Use it as:
- A spread for toast or crackers.
- A topping for salads or pasta dishes.
- An ingredient in stuffed peppers or ravioli.
Conclusion
Making cheese at home with just three ingredients is not only simple but also a rewarding kitchen adventure. With a creamy, fresh taste and endless possibilities for customization, homemade cheese will quickly become a staple in your culinary repertoire. So why not give it a try? You’ll be amazed at how easy and delicious it is!
ADVERTISEMENT
ADVERTISEMENT
