ADVERTISEMENT
Step-by-Step Guide to Cleaning Your Toilet Cistern
Step 1: Turn Off the Water Supply
Before you start cleaning, it’s essential to shut off the water supply to the toilet. Locate the shut-off valve, usually found near the wall behind the toilet, and turn it clockwise to stop the water flow. This will prevent any water from refilling the cistern while you clean.
Step 2: Empty the Cistern
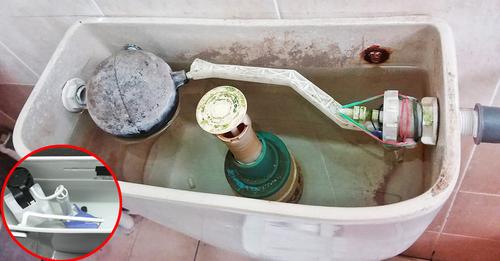
Flush the toilet to empty out as much water from the cistern as possible. If there’s still water left in the tank, you can use a bucket or cup to scoop it out. The goal is to expose the surfaces inside the cistern so you can effectively clean them.
Step 3: Apply a Cleaning Solution
For routine cleaning, use a disinfectant cleaner or toilet bowl cleaner that is safe for use on the inside of the cistern. Alternatively, you can use white vinegar as a natural option to break down mineral deposits and stains.
- For Vinegar Solution: Pour about 2 cups of white vinegar directly into the cistern. Let it sit for 15-20 minutes to dissolve any mineral deposits or mold buildup. You can also add a bit of baking soda for extra cleaning power.
- For Heavy Stains: If you have tough stains, especially hard water buildup, apply a mixture of 1 cup of vinegar and 2 tablespoons of baking soda to the affected areas. Allow it to sit for 30 minutes to an hour before scrubbing.
Step 4: Scrub the Cistern
After the cleaning solution has had time to work, take a toilet brush or soft sponge and scrub the inside of the cistern. Pay extra attention to the corners, edges, and any areas with visible stains. Use a toothbrush to reach any small, hard-to-access spots, such as around the flush mechanism or on the sides of the tank.
For any stubborn mineral deposits or stains, gently scrub using baking soda as an abrasive. This will help remove buildup without scratching the cistern’s surfaces.
Step 5: Rinse and Refill
Once you’ve scrubbed the cistern thoroughly, turn the water supply back on and flush the toilet to rinse away any remaining cleaner or debris. If needed, repeat the scrubbing process to get rid of any lingering stains.
Step 6: Dry and Polish
Use a soft cloth or towel to wipe down the outside of the cistern and any other exposed areas. This will not only make your cistern look spotless but also prevent water spots and streaks. You can even use a bit of glass cleaner or a vinegar-water solution to polish the outer surface and make it shine like new.
Step 7: Regular Maintenance
To keep your cistern looking fresh and functioning properly, it’s a good idea to clean it every 3 to 6 months. If you live in an area with hard water, more frequent cleaning may be necessary to prevent mineral deposits from building up.
Tips for Keeping Your Toilet Cistern Clean:
- Use a Toilet Tank Cleaner: Consider placing a toilet tank cleaner or a cleaning tablet in your cistern. These products can help reduce the buildup of grime and minerals.
- Avoid Harsh Chemicals: Stay away from harsh chemical cleaners, as they can damage the internal components of your toilet cistern. Stick to gentle, natural solutions like vinegar and baking soda for regular cleaning.
- Maintain the Water Supply: If you have hard water, you may want to install a water softener to reduce mineral deposits and keep your cistern cleaner for longer.
Conclusion
A clean toilet cistern not only makes your bathroom look better but also ensures that your toilet works efficiently. With a few simple steps, you can eliminate grime, stains, and mineral deposits from your cistern and keep it looking like new. Regular maintenance is key to preventing buildup and ensuring a long-lasting, functional toilet. So, roll up your sleeves and give your cistern the care it deserves—your toilet will thank you!
ADVERTISEMENT
