ADVERTISEMENT
3. Create a Baking Soda Paste
One of the most effective and natural oven-cleaning solutions is a baking soda paste. This gentle yet powerful cleaner can tackle grease, stains, and baked-on food without using harsh chemicals.
To make the paste:
- Mix 1/2 cup of baking soda with a few tablespoons of water until you form a thick, spreadable paste. You can also add a little bit of dish soap to the mix for added grease-fighting power.
Why it works: Baking soda acts as a mild abrasive, lifting dirt and grease without scratching your oven’s surfaces. The paste also neutralizes odors, leaving your oven smelling fresh.
4. Apply the Baking Soda Paste
Using a sponge or microfiber cloth, spread the baking soda paste over the interior surfaces of your oven, including the bottom, sides, and the back walls. Focus on areas with stubborn grease or food residue.
Tip: For extra dirty spots, apply a thicker layer of paste and let it sit for about 10–15 minutes to loosen tough grime.
5. Clean the Oven Racks
While the paste is sitting, take the oven racks and soak them in soapy water. If your racks are heavily soiled, you can add a cup of white vinegar to the water for extra cleaning power. Let them soak for 15–20 minutes to loosen up grease and food particles.
After soaking, scrub the racks with a non-abrasive sponge to remove any remaining dirt. Rinse them thoroughly and dry them with a clean towel.
6. Wipe Away the Baking Soda Paste
Once the paste has had time to sit and do its work, grab a damp microfiber cloth or sponge and start wiping away the baking soda. You’ll notice that the paste has softened grease and grime, making it much easier to wipe away.
For any spots that are still stubborn, you can add a little more paste, wait a few minutes, and then wipe again.
7. Spray with Vinegar for Extra Cleaning Power
To remove any remaining residue and give your oven a final fresh boost, spray white vinegar over the areas you just cleaned. The vinegar will react with the baking soda, creating a fizzing action that helps lift any last bits of grime.
Once the fizzing stops, wipe the interior down with a clean, damp cloth. This step will also neutralize any lingering baking soda residue, leaving your oven shiny and clean.
8. Clean the Oven Door
The oven door often collects grease and splatters, so don’t forget to clean it. For the exterior, use a vinegar-water solution in a spray bottle. Spray it on the glass and wipe with a microfiber cloth.
If the door has heavy grime, make a thicker paste with baking soda and water, apply it to the glass, and let it sit for 10 minutes before wiping it off.
For the interior of the oven door, use the same baking soda paste and vinegar spray method as you did for the rest of the oven.
9. Reassemble the Oven
Once everything is clean, replace the oven racks, trays, and any other removable parts. Give the oven a quick wipe down with a dry microfiber cloth to remove any moisture.
Final Touch: A Quick Freshening Up
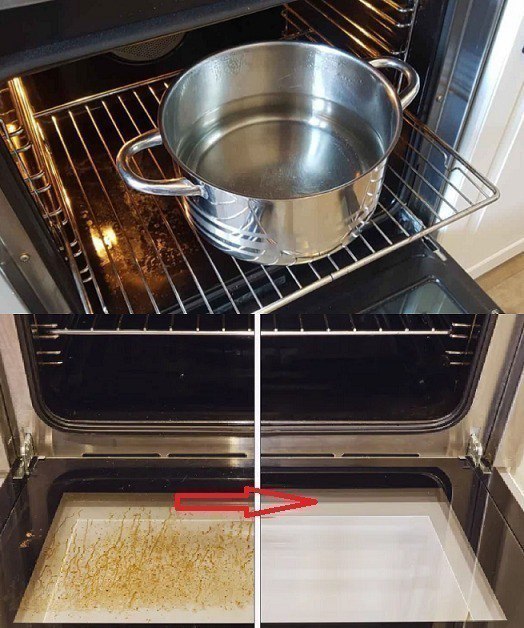
For that fresh, brand-new look and smell, leave the oven door open for a few minutes after cleaning to air it out. If you’re looking for an extra fresh scent, you can leave a small bowl of vinegar in the oven for an hour to help neutralize any remaining odors.
Additional Tips for Oven Maintenance
- Clean your oven regularly: Try to do a quick clean every month to prevent heavy build-up. Spot cleaning as you go can save you time and effort in the long run.
- Avoid using harsh chemicals: While commercial oven cleaners can be effective, they often contain harsh chemicals that can be harmful to your health and the environment. Opt for natural, non-toxic cleaners like vinegar and baking soda whenever possible.
- Line your oven: Consider placing an oven liner or aluminum foil on the bottom of your oven to catch spills and crumbs. Just be sure not to block ventilation holes.
Conclusion: A Sparkling Oven in Minutes
Cleaning your oven doesn’t have to be a time-consuming, back-breaking task. By using simple, natural ingredients like baking soda and vinegar, you can eliminate grease, grime, and baked-on food quickly and efficiently. With just a little effort, your oven will look and smell brand new again, making your kitchen feel fresh and clean.
Next time you tackle oven cleaning, remember: with the right tools and a few easy steps, you can get it done in minutes—not hours. Happy cleaning!
ADVERTISEMENT
ADVERTISEMENT
