ADVERTISEMENT
Instructions:
1. Activate the Yeast:
Start by dissolving the yeast in the warm milk (make sure it’s not too hot, as this can kill the yeast). Add a pinch of sugar to the milk and stir. Let the mixture sit for about 5 minutes until it becomes frothy. This step ensures that your donuts will rise perfectly.
2. Mix the Wet Ingredients:
In a large mixing bowl, whisk together the sugar, melted butter, and vanilla extract. Add the eggs one at a time, mixing well after each addition. Once the yeast mixture is ready, pour it into the wet ingredients and stir to combine.
3. Add the Dry Ingredients:
In a separate bowl, combine the flour and salt. Gradually add the dry ingredients to the wet ingredients, mixing until a dough forms. You may need to use your hands towards the end to bring the dough together, but be careful not to overwork it.
4. Knead the Dough:
Turn the dough out onto a lightly floured surface and knead it for about 5 minutes, or until it becomes smooth and elastic. If the dough is too sticky, sprinkle a little more flour as needed, but be careful not to add too much. The dough should be soft and slightly tacky to the touch.
5. Let the Dough Rise:
Form the dough into a ball and place it in a lightly greased bowl. Cover with a clean kitchen towel or plastic wrap and let it rise in a warm spot for about 1 to 1 1/2 hours, or until it has doubled in size. This allows the yeast to work its magic and makes the donuts light and fluffy.
6. Shape the Donuts:
Once the dough has risen, punch it down to release any air bubbles. Turn it out onto a floured surface and roll it out to about 1/2-inch thickness. Use a donut cutter or two round cutters (one larger and one smaller) to cut out the donut shapes. You can also use a glass to cut the outer circle and a bottle cap or small cookie cutter for the center hole.
7. Heat the Oil:
Fill a large pot or deep fryer with vegetable oil about 2-3 inches deep. Heat the oil to 350°F (175°C). You can test the oil by dropping a small piece of dough into it—if it sizzles and rises to the surface, it’s ready.
8. Fry the Donuts:
Carefully drop a few donuts into the hot oil at a time, making sure not to overcrowd the pot. Fry each donut for about 2-3 minutes per side, or until golden brown. Use a slotted spoon to remove the donuts from the oil and place them on a paper towel-lined plate to drain any excess oil.
9. Make the Glaze (Optional):
While the donuts are cooling slightly, you can prepare the glaze. In a small bowl, whisk together the powdered sugar, milk, and vanilla extract until smooth and glossy. You can adjust the consistency by adding more milk if the glaze is too thick.
10. Glaze the Donuts:
Once the donuts have cooled for a few minutes, dip the top of each donut into the glaze. Let the excess glaze drip off before placing the donuts on a cooling rack or serving platter. If you like, you can add sprinkles, chocolate drizzle, or other toppings at this stage.
Serving Suggestions:
These homemade donuts are delicious on their own, but here are a few creative ways to serve them:
- With a Cup of Coffee or Tea: Donuts are perfect with a hot drink, especially if you enjoy them for breakfast or a mid-afternoon snack.
- Stuffed Donuts: Try filling the donuts with jam, chocolate ganache, or pastry cream for a special treat.
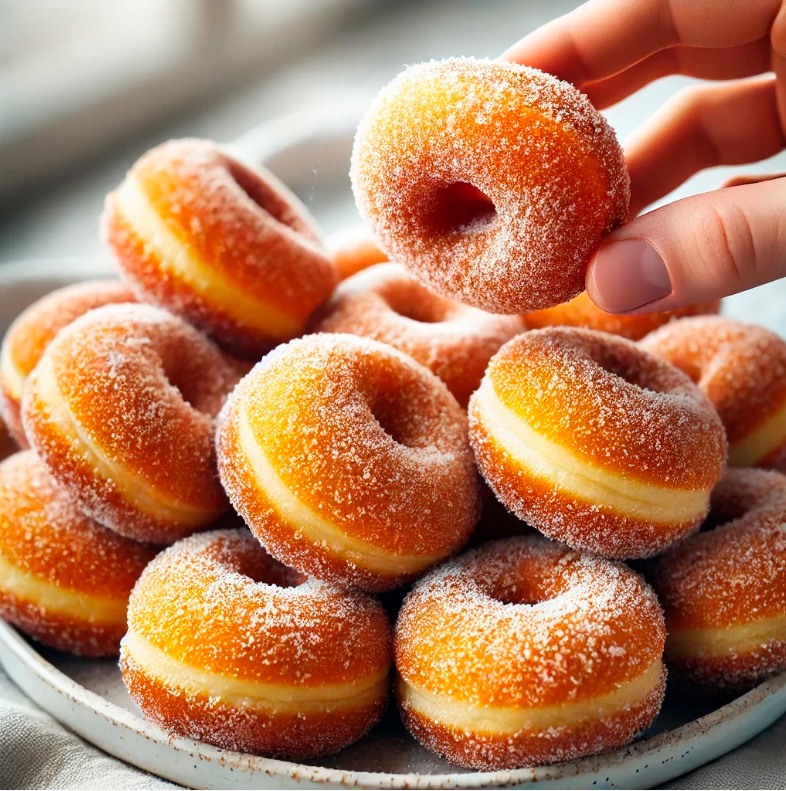
- Sugar-Coated: For a classic touch, roll the donuts in a mixture of cinnamon and sugar right after frying.
- Topped with Chocolate: If you’re a chocolate lover, dip your donuts in melted chocolate instead of glaze, or drizzle it over the top.
Tips for Perfect Homemade Donuts:
- Oil Temperature: Keep the oil at a consistent temperature of 350°F (175°C) while frying to ensure the donuts cook evenly and don’t absorb too much oil.
- Resting Time: Allow the dough to rise properly—don’t rush this step, as it gives the donuts their light and fluffy texture.
- Flavor Variations: You can easily customize these donuts by adding citrus zest, spices like cinnamon, or even chocolate chips to the dough before frying.
- Storage: Homemade donuts are best enjoyed fresh, but you can store them in an airtight container for up to 2 days. If you want to keep them for longer, freeze the unglazed donuts and glaze them later.
Conclusion:
Making homemade donuts is a fun and rewarding experience that results in the most delicious, fresh treats. With this simple recipe, you can enjoy the comforting taste of warm, soft, and golden donuts without having to leave your kitchen. Whether you keep them classic with a glaze or get creative with fillings and toppings, homemade donuts are a perfect way to indulge in something sweet. So, gather your ingredients and get ready to fry up a batch of donuts that will make your kitchen smell like a bakery!
ADVERTISEMENT
