ADVERTISEMENT
Instructions for Making Homemade Digestive Biscuits
Step 1: Prepare the Dry Ingredients
- Start by preheating your oven to 350°F (175°C). Line a baking sheet with parchment paper or a silicone baking mat to prevent the biscuits from sticking.
- In a large mixing bowl, combine the whole wheat flour, plain flour, brown sugar, baking soda, and salt. Stir the dry ingredients together until they are well combined.
Step 2: Incorporate the Butter
- Add the cold, cubed butter to the dry ingredients. Use your fingers or a pastry cutter to rub the butter into the flour mixture until it resembles coarse breadcrumbs. You should see small pea-sized pieces of butter throughout the mixture. This is important for getting that crumbly, light texture in your biscuits.
- If you’re adding rolled oats, now is the time to mix them in. The oats add a subtle texture and a heartiness to the biscuits.
Step 3: Add the Wet Ingredients
- Pour in the milk and vanilla extract (if using). Use a fork to bring the dough together, adding a little more milk if necessary. You want the dough to be firm but not too sticky. If the dough feels too dry, add a teaspoon of milk at a time until it holds together when pressed.
- Once the dough comes together, shape it into a ball. Flatten the dough into a thick disk, wrap it in plastic wrap, and chill it in the refrigerator for about 15-20 minutes. Chilling the dough helps the biscuits hold their shape during baking.
Step 4: Roll Out the Dough
- After chilling, remove the dough from the fridge and place it on a lightly floured surface. Roll the dough out to about 1/4 inch thick. The thinner you roll it, the crisper the biscuits will be.
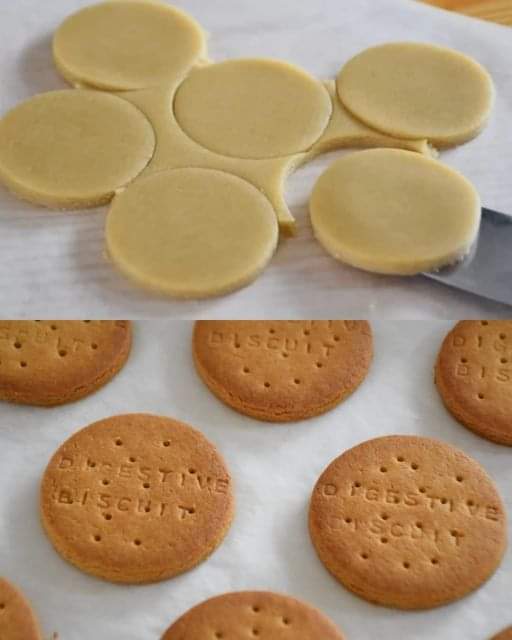
- Using a cookie cutter or a glass (about 2 inches in diameter), cut out rounds from the dough. Gather any leftover dough, reroll it, and continue cutting out biscuits until all the dough is used.
Step 5: Bake the Biscuits
- Place the cut dough rounds onto the prepared baking sheet, leaving a little space between each biscuit. You can lightly press each biscuit with the back of a fork for a traditional digestive biscuit look.
- Bake the biscuits in the preheated oven for 12-15 minutes, or until they are golden brown around the edges. Keep an eye on them towards the end, as they can burn quickly once they start browning.
- Once baked, remove the biscuits from the oven and allow them to cool on the baking sheet for a few minutes before transferring them to a wire rack to cool completely.
Step 6: Serve and Enjoy
- Your Homemade Digestive Biscuits are now ready to be enjoyed! Serve them with a hot cup of tea, or simply snack on them throughout the day. These biscuits are also perfect for dipping into coffee, or pairing with cheese, jams, or fruit for a more substantial snack.
Tips for the Best Digestive Biscuits
- Chill the Dough: Don’t skip the chilling step! Chilling the dough before rolling it out helps the biscuits hold their shape and prevents them from spreading too much while baking.
- Use Cold Butter: Make sure your butter is cold when you rub it into the flour. This helps to create the signature crumbly texture of digestive biscuits.
- Customize the Flavor: Feel free to add spices like cinnamon or nutmeg for a warm, aromatic twist. You could also add chocolate chips or dried fruit like raisins or cranberries to make these biscuits even more special.
- Storage: These biscuits can be stored in an airtight container for up to a week. If you’d like to keep them fresh for longer, you can also freeze them for up to a month.
- Gluten-Free Version: If you’re gluten-free, you can substitute the flours with a gluten-free flour blend, although the texture may vary slightly. You may also need to add a bit more liquid to compensate for the differences in flour consistency.
Why Homemade Digestive Biscuits Are Worth the Effort
Making Homemade Digestive Biscuits at home gives you a fresher, more flavorful version of this classic treat. With just a handful of simple ingredients and a few easy steps, you can create a batch of biscuits that are far superior to anything you’ll find in a store. Whether you’re enjoying them as an everyday snack, a part of your afternoon tea, or even as a base for desserts like cheesecake crust, these biscuits are a must-try.
Best of all, you can control the ingredients, ensuring your digestive biscuits are made with the highest-quality, wholesome ingredients. So, why not skip the store-bought version and treat yourself to a homemade batch? Your taste buds will thank you!
ADVERTISEMENT
