ADVERTISEMENT
Instructions:
Step 1: Prepare the Dough
In a large bowl, combine the warm water, sugar, and yeast. Stir gently and let it sit for about 5 minutes until the yeast becomes foamy. This step activates the yeast and ensures your breadsticks will rise properly.
Once the yeast is activated, add the flour, salt, and olive oil. Mix everything together until a dough begins to form. You can use a stand mixer with a dough hook or your hands to knead the dough. Knead the dough for about 5-7 minutes until it becomes smooth and elastic.
Step 2: Let the Dough Rise
Place the dough in a lightly oiled bowl and cover it with a clean kitchen towel or plastic wrap. Let it rise in a warm place for about 1 hour or until it has doubled in size. The rising process is key to achieving soft, fluffy breadsticks.
Step 3: Preheat the Oven
While the dough is rising, preheat your oven to 400°F (200°C). Line a baking sheet with parchment paper or lightly grease it to prevent the breadsticks from sticking.
Step 4: Shape the Dough
Once the dough has risen, punch it down to release any air bubbles. Turn the dough out onto a lightly floured surface and roll it into a rectangle or oval shape, about 10×12 inches. Use your hands to stretch the dough if necessary.
Cut the dough into 12 equal strips using a sharp knife or pizza cutter. Carefully transfer the strips to your prepared baking sheet, spacing them out evenly.
Step 5: Add Garlic Butter
In a small bowl, mix the melted butter, minced garlic, and Italian seasoning (if using). Brush the garlic butter generously over the tops of the breadsticks, ensuring that each one gets a nice coating of the garlicky goodness.
Step 6: Add the Cheese
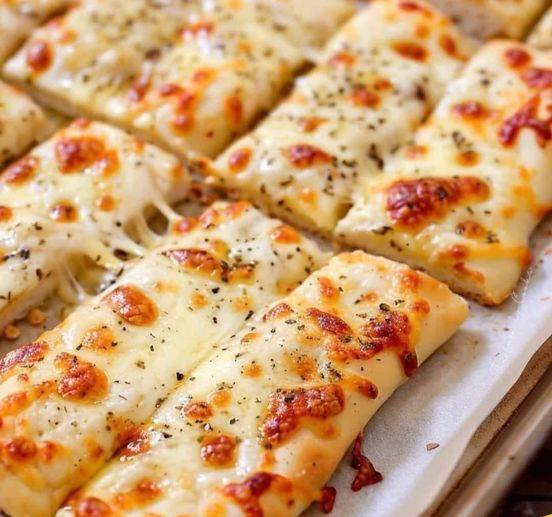
Sprinkle the shredded mozzarella cheese and grated Parmesan cheese evenly over the breadsticks. The cheese will melt beautifully during baking, creating a cheesy, gooey topping that’s simply irresistible.
Step 7: Bake the Breadsticks
Bake the breadsticks in the preheated oven for about 12-15 minutes, or until they’re golden brown and the cheese is bubbly and slightly browned. Keep an eye on them toward the end of the baking time to prevent over-browning.
Step 8: Finish with Garlic Butter
Once the breadsticks are out of the oven, brush them with any remaining garlic butter mixture to add extra flavor. Garnish with freshly chopped parsley for a pop of color and freshness.
Step 9: Serve and Enjoy!
Allow the breadsticks to cool for a few minutes before serving. Enjoy them while they’re warm and cheesy, and watch as they disappear quickly!
Why You’ll Love Homemade Cheesy Garlic Breadsticks:
- Cheesy goodness: The generous amount of mozzarella and Parmesan cheese creates a melty, cheesy topping that pairs perfectly with the soft, fluffy breadsticks.
- Garlic lover’s dream: The combination of rich garlic butter and freshly minced garlic infuses the breadsticks with bold, savory flavors that will have you craving more.
- Soft and fluffy: These breadsticks are light and tender inside, thanks to the yeast dough. The outer layer is slightly crispy, creating the perfect contrast in texture.
- Customizable: You can make these breadsticks your own by experimenting with different cheese blends, herbs, or even adding a sprinkle of red pepper flakes for some heat.
- Perfect for any occasion: Whether you’re serving them alongside pasta, salads, or enjoying them on their own, these cheesy garlic breadsticks are the perfect addition to any meal. They also make a fantastic appetizer for parties or gatherings.
Tips for Perfect Cheesy Garlic Breadsticks:
- Yeast proofing: If your yeast doesn’t foam after a few minutes, it may be expired. Fresh yeast is crucial for the dough to rise properly.
- Rising time: If you’re short on time, you can speed up the rising process by placing the dough in a warm (but not hot) place, like an oven with just the light on. Avoid letting the dough sit in a cold spot.
- Cheese variations: Experiment with different cheeses such as cheddar, provolone, or asiago for unique flavor combinations. Adding some cream cheese to the topping creates a creamy, indulgent twist.
- Herb infusion: For an extra burst of flavor, mix some dried oregano, basil, or rosemary into the garlic butter before brushing it on the breadsticks.
- Leftovers: Store leftover breadsticks in an airtight container at room temperature for up to 2 days. You can also freeze them for up to 3 months. Reheat them in the oven for a few minutes to restore their crispy texture.
Final Thoughts
These Homemade Cheesy Garlic Breadsticks are the ultimate comfort food, combining gooey cheese, fragrant garlic, and soft, fluffy breadsticks all in one delicious bite. Perfect for serving at family dinners, parties, or just as a special treat, they are guaranteed to be a crowd-pleaser. With this easy-to-follow recipe, you can enjoy the irresistible flavor of cheesy garlic breadsticks right at home.
So, gather your ingredients, preheat your oven, and get ready to indulge in a warm, cheesy, and garlicky delight that will have everyone coming back for seconds!
ADVERTISEMENT
ADVERTISEMENT
