ADVERTISEMENT
Step-by-Step Instructions
Step 1: Prepare the Milk
- Warm the Milk: Pour the whole milk into a large pot and place it on the stove. Heat the milk gently over medium heat, stirring occasionally to prevent scorching. Warm it to about 85°F (29°C), which is the ideal temperature for adding the culture and rennet.
- Add Vinegar: Once the milk reaches the desired temperature, add the vinegar or lemon juice. This will begin to acidify the milk and help it curdle later. Stir gently to mix.
- Add Cheese Culture (Optional): If you’re using a cheese culture (which is commonly done for more complex cheeses), sprinkle it over the milk and let it sit for about 5 minutes. Then, stir it in gently to distribute it evenly.
Step 2: Add Rennet
- Dissolve the Rennet: In a small bowl, dissolve the rennet tablet (or liquid rennet) in 1/4 cup of cool water. Stir the mixture until fully dissolved.
- Add the Rennet to the Milk: Once the rennet is dissolved, slowly pour it into the warm milk while gently stirring in an up-and-down motion. Stir for about 30 seconds to ensure the rennet is well distributed.
- Let the Milk Set: After stirring in the rennet, cover the pot with a clean kitchen towel and let the milk sit undisturbed at 85°F (29°C) for about 60-90 minutes. During this time, the curds will form, and the milk will become thicker. The result should be a firm curd when you gently touch the surface.
Step 3: Cut the Curds
- Check the Curds: After the milk has set and curds have formed, check the texture. Gently press the surface of the curds with your finger. If it gives a bit but doesn’t break, you’re ready to cut.
- Cut the Curds: Use a long knife or cheese curd cutter to cut the curds into 1/2-inch cubes. This allows the whey (the liquid portion) to separate from the curds more effectively.
- Let the Curds Rest: Let the curds rest for about 10-15 minutes after cutting to allow them to firm up slightly.
Step 4: Cook the Curds
- Heat the Curds: Slowly heat the curds to about 110°F (43°C) by gently raising the temperature over low heat. Stir the curds occasionally, being careful not to break them apart too much. This process helps expel more whey and firm up the curds.
- Continue Stirring: Stir the curds gently for another 30-40 minutes. As the curds cook, they will shrink and firm up, releasing more whey.
Step 5: Drain and Press the Curds
- Drain the Whey: Once the curds have reached the desired consistency, remove the pot from the heat. Place a colander over a large bowl and line it with cheese cloth. Pour the curds into the colander to drain off the whey. Let the curds sit in the colander for a few minutes to allow any excess liquid to drain.
- Press the Curds: After draining, gather the corners of the cheese cloth and form a pouch. Gently press the curds to expel any remaining whey. For a firmer cheese block, you can press the curds under a weight for 4-6 hours, depending on how dry or moist you want the cheese to be.
Step 6: Shape and Salt the Cheese
- Shape the Cheese: Once the curds are well-drained, place them into a cheese mold, pressing down gently to form the shape of your block. Cheese molds come in various sizes and shapes, so you can customize your cheese block to any size you prefer.
- Salt the Cheese: Once the cheese has taken shape, sprinkle it with salt. Salt helps to enhance flavor and preserve the cheese. Use about 1 tablespoon of salt for a small block, or adjust according to the size of the cheese.
- Press Again: Press the cheese one more time to ensure it holds its shape. Leave the cheese to sit in the mold for about 12-24 hours, depending on the texture you desire.
Step 7: Age the Cheese (Optional)
To enjoy a richer flavor, you can age the cheese. After pressing, remove the cheese from the mold and wrap it in cheese paper or wax paper. Store it in a cool, humid place (such as a cheese cave or refrigerator with a humidity tray) for 1-4 weeks, depending on your preference for sharpness. As it ages, the flavor will deepen and the texture will become firmer.
Enjoy Your Homemade Cheese Block
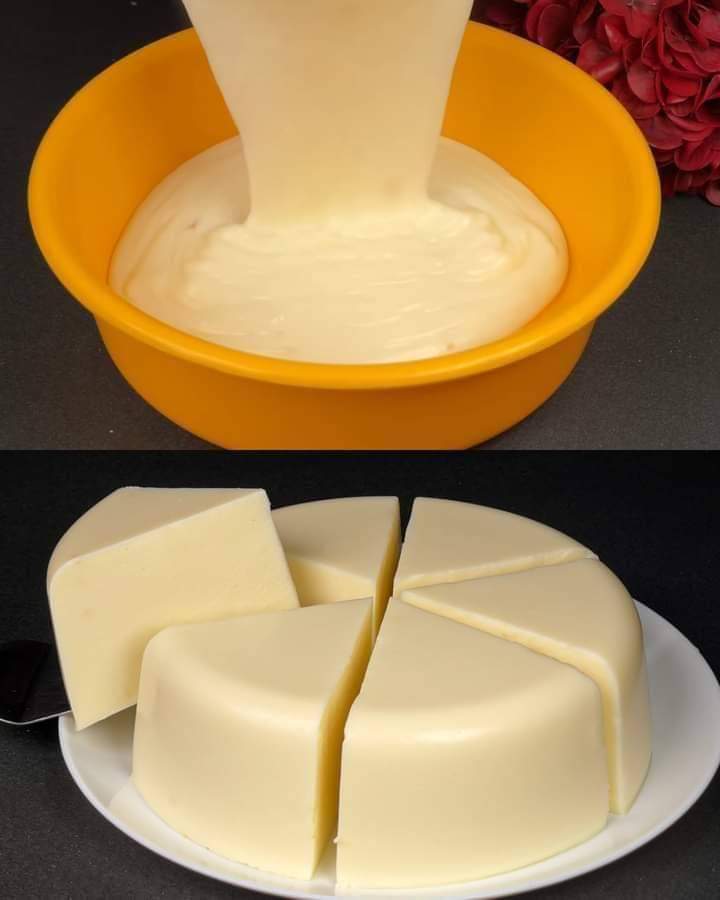
Once your homemade cheese block is finished, it’s time to enjoy it! You can slice it for sandwiches, grate it for pastas, or simply serve it with crackers, fruits, and nuts for a delicious appetizer. The possibilities are endless, and nothing beats the satisfaction of enjoying a cheese that you made yourself.
Conclusion
Making a Homemade Cheese Block is a rewarding process that brings the flavors of fresh, artisanal cheese right into your kitchen. With a few simple ingredients and some patience, you can create a creamy, rich cheese that will elevate any meal. Whether you’re a seasoned cheese maker or a beginner, this recipe is an excellent starting point to explore the world of homemade cheeses. Happy cheesemaking!
ADVERTISEMENT
