ADVERTISEMENT
Instructions:
Step 1: Prepare the Milk
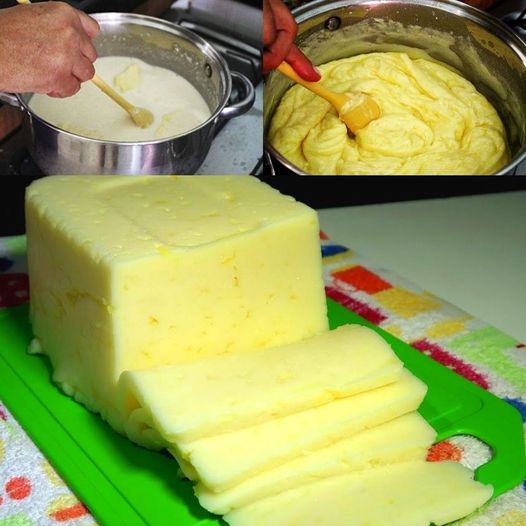
Pour the gallon of milk into your large pot. Slowly heat the milk over medium heat, stirring occasionally to prevent scorching. Use a thermometer to monitor the temperature. When the milk reaches 85°F (29°C), add the dissolved citric acid. Stir gently, then continue heating the milk until it reaches 90°F (32°C).
Step 2: Add the Rennet
Dissolve your rennet in 1/4 cup of cool, non-chlorinated water. Add this to the milk, stirring gently for about 30 seconds. Cover the pot and let it sit undisturbed for about 30 minutes. During this time, the milk will begin to curdle, forming curds and whey.
Step 3: Cut the Curds
After 30 minutes, you should see that the curds have formed a gel-like consistency. Using a long knife or a curd cutter, cut the curds into 1-inch cubes. Let the curds sit for 5–10 minutes to firm up.
Step 4: Heat the Curds
Now, gently heat the curds over medium heat, stirring occasionally. Bring the temperature up to 105°F (40°C) over the course of about 20–30 minutes. This will help the curds firm up further.
Step 5: Drain the Whey
Once the curds have reached the desired firmness, use a slotted spoon to transfer them to a colander or bowl lined with cheesecloth. Let the whey drain for about 10 minutes, reserving some of the liquid in case you want to use it later (you can use it in baking or smoothies!).
Step 6: Stretch and Shape the Cheese
Transfer the drained curds to a microwave-safe bowl. Microwave the curds for 30 seconds at a time, stirring in between, until the curds are hot and stretchable (about 2–3 minutes total). Once the cheese is hot and stretchy, add the salt and continue to stretch and fold the cheese until it forms a smooth, elastic ball.
Step 7: Chill the Mozzarella
Immediately place your fresh mozzarella ball into a bowl of ice water to cool and firm up. This step also helps the cheese maintain its texture.
Step 8: Enjoy!
Once your mozzarella is cool, you can either enjoy it right away or store it in the fridge in a container of salted water. Homemade mozzarella will keep for about 1 week in the fridge.
Other Cheese Varieties to Try
Once you’ve mastered mozzarella, you can experiment with other cheeses that are equally simple and inexpensive to make at home. Here are some ideas:
- Ricotta: Using leftover whey from mozzarella or fresh milk, you can quickly make ricotta cheese, which is great for lasagna or as a spread.
- Cream Cheese: With just cream, milk, and a little lemon juice or vinegar, you can make a smooth, tangy cream cheese perfect for bagels or cheesecakes.
- Paneer: This Indian cheese is made by curdling milk with lemon juice or vinegar and is great for curries or grilling.
- Feta: Feta can be made with cow’s or goat’s milk and is a flavorful, brined cheese that adds a tangy bite to salads and Mediterranean dishes.
Tips for Success:
- Use quality milk: The fresher the milk, the better the cheese. Organic, grass-fed milk usually yields the best results.
- Rennet and citric acid: These are essential for curdling the milk and should be readily available from most specialty food stores or online.
- Temperature control: Consistent heat is crucial to the cheese-making process. Be sure to monitor the temperature closely with a thermometer to ensure you’re in the correct range.
- Experiment: Once you get the hang of making mozzarella, feel free to experiment with different textures and flavors by adding herbs, spices, or even smoking the cheese!
Conclusion: Save Money and Make Your Own Cheese
Making cheese at home is not only cost-effective, but it’s also a fun and rewarding process. You can create a variety of cheeses to suit your taste, and in the end, you’ll have fresh, homemade cheese that tastes better than anything you can find at the store—all at a fraction of the cost. So why not give it a try? With a little time and patience, you’ll be enjoying your very own homemade cheese in no time!
ADVERTISEMENT
