ADVERTISEMENT
Step 2: Add the Butter
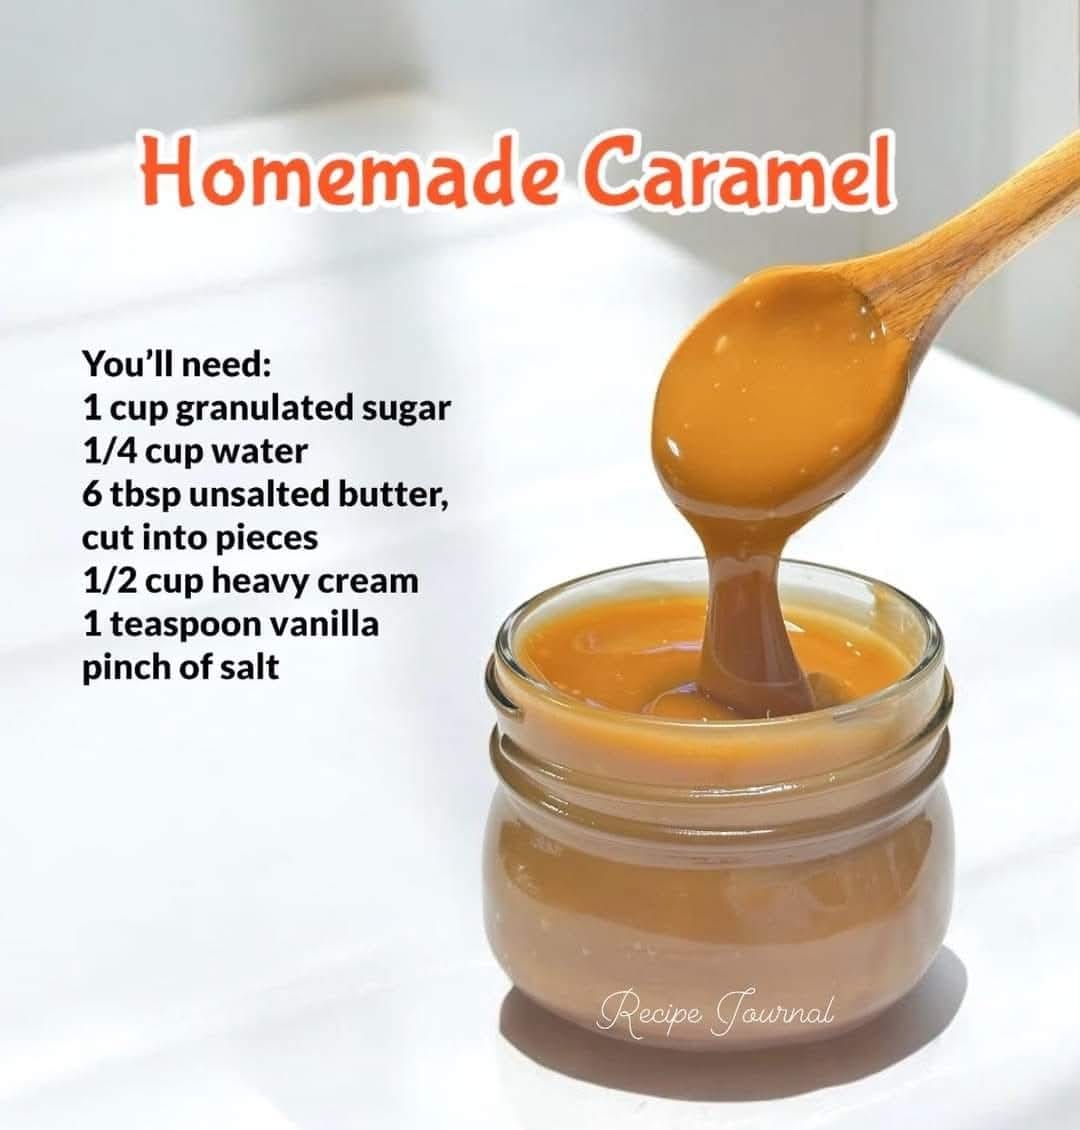
Once the sugar has melted and has reached a deep amber color, carefully add the unsalted butter. The mixture will bubble up when the butter hits the hot sugar, so be cautious. Stir the butter into the caramel until it is fully incorporated.
Step 3: Add the Cream
Now it’s time to add the heavy cream. Again, the mixture will bubble and froth, so take care. Stir the cream into the caramel until smooth. If the caramel has hardened during this step, simply place the pan back over low heat and continue stirring until it becomes smooth and glossy.
Step 4: Flavor It
At this point, you can add the optional vanilla extract and a pinch of salt for salted caramel. Stir these in until well combined. If you want a deeper flavor, you can also add a tablespoon of bourbon or rum for an adult twist.
Step 5: Cool and Store
Remove the caramel from the heat and let it cool for a few minutes. It will thicken as it cools, so don’t worry if it seems thin at first. Transfer the caramel to a heatproof jar or container, and allow it to cool completely before using. It can be stored in the refrigerator for up to two weeks. When you’re ready to use it again, simply warm it up in the microwave or over the stove.
Tips for Perfect Homemade Caramel
- Watch the Sugar Closely: The most important step in making caramel is melting the sugar without burning it. Keep an eye on it, and once it turns amber, act quickly to add the butter and cream.
- Use Room Temperature Ingredients: Make sure your butter and cream are at room temperature before adding them to the caramel. Cold butter or cream can cause the hot sugar to seize up or splatter.
- Don’t Stir Too Much: When melting the sugar, avoid stirring too often. Stirring can cause the sugar to crystallize, which will result in a grainy texture. Gently swirling the pan is enough.
- Salted Caramel: If you’re making salted caramel, use sea salt or flaky salt for the best texture and flavor. Add the salt to taste, but remember that a little goes a long way.
- Temperature Matters: The ideal caramel color is a rich amber. If it gets too dark, it will taste burnt, so be careful not to overcook the sugar.
- Stay Safe: Caramel gets extremely hot, so be careful when handling the hot sugar syrup. Never touch it directly, and be cautious when adding the cream and butter to avoid burns.
How to Use Homemade Caramel
Once you’ve made your homemade caramel, the possibilities are endless. Here are just a few ideas on how to use it:
- Drizzle Over Desserts: Pour your homemade caramel over ice cream, cheesecake, or apple pie for an indulgent treat. It’s also fantastic on brownies or cakes.
- Coffee and Lattes: Add a spoonful of caramel to your morning coffee or latte for a sweet, comforting flavor.
- Dip Apples: For a fall-inspired snack, dip fresh apple slices into the homemade caramel for a delicious, crunchy treat.
- Caramel Popcorn: Make your own caramel popcorn by drizzling homemade caramel over freshly popped popcorn and allowing it to set.
- Gifts: Package homemade caramel in small jars with a ribbon and give it as a thoughtful, homemade gift.
Why You’ll Love Homemade Caramel
Making caramel from scratch might seem intimidating at first, but with a little patience and the right technique, it’s a simple process that yields incredible results. The flavor of homemade caramel is unmatched by store-bought versions, and you can control the sweetness, texture, and flavor to make it your own.
Once you master the art of making caramel, you’ll find yourself using it in a variety of dishes—from desserts to beverages, and even as a topping for savory foods. The best part? You know exactly what’s going into it, and there are no added preservatives or artificial flavors.
Try making this homemade caramel today, and enjoy the sweet, creamy richness that will elevate all of your favorite treats!
ADVERTISEMENT
ADVERTISEMENT
