ADVERTISEMENT
Instructions:
1. Prepare the Chocolate Domes
Melt the Chocolate:
Start by chopping the chocolate into small pieces to ensure it melts evenly. Place the chocolate in a heatproof bowl over a pot of simmering water (double boiler method). Stir frequently until the chocolate is completely melted and smooth. Alternatively, you can melt it in the microwave in 30-second intervals, stirring in between to avoid burning.
Add Coconut Oil:
Once the chocolate is melted, stir in the tablespoon of coconut oil. This will make the chocolate smoother and give it a beautiful sheen once it sets.
Coat the Molds:
If you have silicone dome molds, they’re perfect for creating chocolate domes. Using a spoon or a pastry brush, carefully coat the inside of each dome mold with a layer of melted chocolate. Make sure to cover all sides evenly. Place the molds in the fridge for about 10–15 minutes to let the chocolate harden slightly.
Add a Second Layer:
Once the first layer has set, add a second layer of chocolate to ensure the domes are sturdy. Return the molds to the fridge for another 10–15 minutes.
2. Make the Caramel Filling
Cook the Sugar:
In a medium saucepan, heat the sugar over medium heat. Stir constantly until it begins to melt and turn amber in color. Be careful not to burn it! This process may take a few minutes, so patience is key.
Add Butter and Cream:
Once the sugar has melted, immediately add the butter and stir until fully incorporated. Be cautious as the mixture will bubble up. Then, slowly pour in the heavy cream, stirring constantly. Let it simmer for 2–3 minutes until the caramel is smooth and thickened.
Finish the Caramel:
Remove from heat and stir in the vanilla extract and a pinch of salt, if desired. Allow the caramel to cool slightly, but not too much—it should still be pourable when filling the chocolate domes.
3. Assemble the Chocolate Domes
Fill the Domes:
Once the chocolate shells are fully set, carefully pop them out of the silicone molds. If you’re using a metal mold, you may need to run the edge of a warm knife around the edge to loosen the chocolate.
Next, carefully fill each chocolate dome with the warm caramel filling. Don’t overfill, as you’ll need to seal the tops of the domes later.
Seal the Domes:
To seal the domes, gently heat a small plate in the microwave (for about 30 seconds). Place the top half of the dome (or a chocolate disc) onto the plate to warm it slightly. This will allow the chocolate to melt just enough to stick when you press it onto the caramel-filled half. Gently press the two halves together to form a sealed dome.
4. Decorate (Optional)
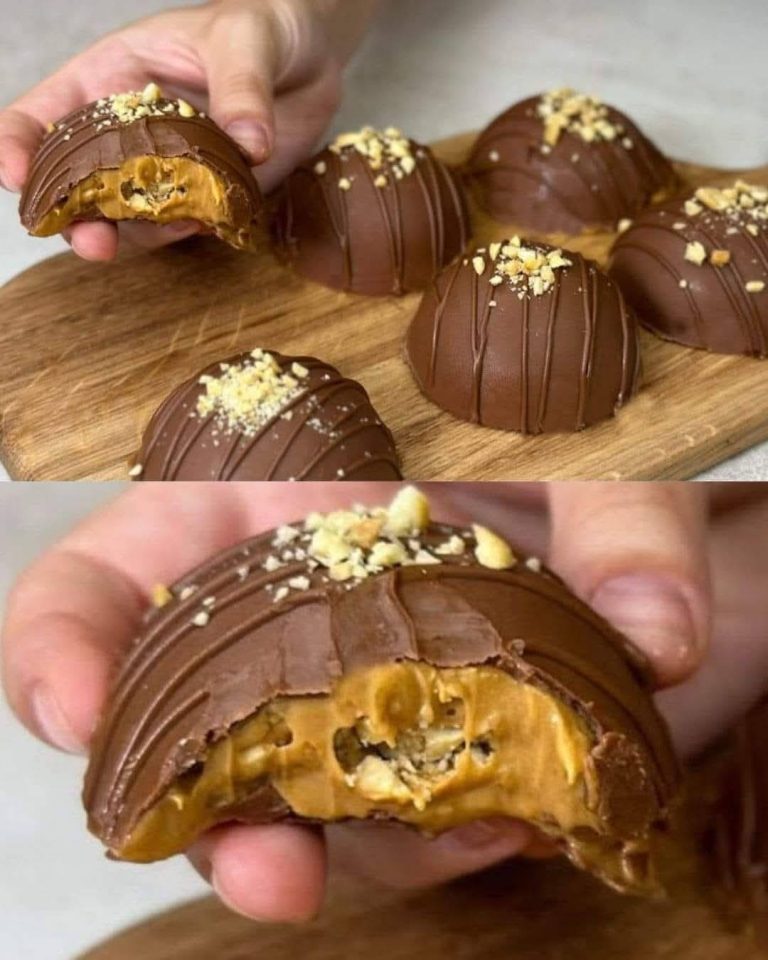
Once your caramel-filled chocolate domes are assembled, you can decorate them for an extra touch of elegance. Sprinkle a pinch of sea salt flakes on top to create a sweet-salty contrast or add some finely shaved chocolate for a luxurious finish. You can even dust them with a little cocoa powder for a sophisticated look.
5. Let the Domes Set
Allow the assembled chocolate domes to set completely. If needed, you can place them back in the fridge for about 15-20 minutes to ensure they are fully hardened.
Tips for Perfect Caramel-Filled Chocolate Domes:
- Use a Good Quality Chocolate: The quality of your chocolate really shines through in this recipe. Opt for high-quality dark or milk chocolate that you love the taste of.
- Watch the Caramel Carefully: When melting the sugar, watch it closely to avoid burning. The key is to stir constantly once it starts to melt, ensuring it reaches that perfect amber color without going too far.
- Storage: Store these domes in an airtight container in a cool place (but not the fridge, unless you live in a hot climate). This ensures the chocolate stays smooth and the caramel filling stays gooey.
- Serving Ideas: These domes are perfect for holiday dinners, dinner parties, or just as an indulgent treat. Serve them on a beautiful platter with a drizzle of extra caramel or chocolate sauce.
Why You’ll Love These Homemade Caramel-Filled Chocolate Domes:
- Irresistible Combination: The rich, silky chocolate and gooey caramel filling create the perfect contrast of flavors and textures.
- Impressive Yet Easy: While these domes may look like something you’d find in a fancy chocolate shop, they’re surprisingly simple to make at home.
- Perfect for Any Occasion: Whether it’s a birthday, holiday, or just a sweet craving, these chocolate domes make any occasion feel special.
- Customizable: You can experiment with different fillings, like hazelnut spread, peanut butter, or even fruit preserves. The possibilities are endless!
Final Thoughts:
Homemade caramel-filled chocolate domes are a show-stopping dessert that combines the best of chocolate and caramel in a stunning, bite-sized package. Perfect for special occasions or an indulgent treat, these chocolate domes will leave your guests or loved ones in awe of both their appearance and flavor.
So why not treat yourself to these decadent homemade delights? With a little time and patience, you can create a dessert that’s truly a masterpiece!
ADVERTISEMENT
ADVERTISEMENT
