ADVERTISEMENT
Instructions:
Step 1: Activate the Yeast
- Proof the Yeast: In a small bowl, combine the warm water and sugar. Sprinkle the active dry yeast on top of the water. Let it sit for about 5-10 minutes. The mixture should become frothy or bubbly, which means the yeast is active and ready to use. If it doesn’t bubble, your yeast may be expired, and you’ll need to try again with fresh yeast.
Step 2: Mix the Dough
- Combine Dry Ingredients: In a large mixing bowl, combine the flour and salt.
- Add the Yeast Mixture: Once the yeast is ready, add it to the flour mixture along with the olive oil. Stir everything together with a wooden spoon or your hands until a dough begins to form. It should be slightly sticky but easy to handle.
Step 3: Knead the Dough
- Knead the Dough: Turn the dough out onto a lightly floured surface. Begin kneading it by folding the dough in half, pressing down, and then turning it a quarter turn. Keep kneading for about 8-10 minutes until the dough becomes smooth, elastic, and slightly tacky to the touch. If the dough is too sticky, add a bit more flour, a tablespoon at a time, but try to avoid adding too much. You want the dough to remain soft and pliable.
Step 4: Let the Dough Rise
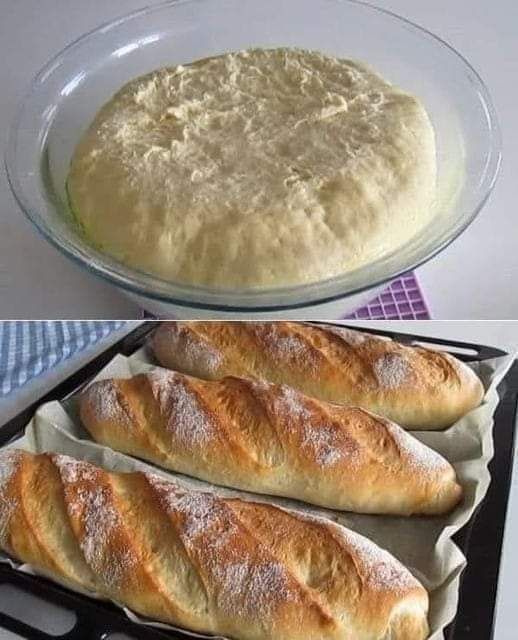
- First Rise: Place the kneaded dough into a lightly oiled bowl and cover it with a clean kitchen towel or plastic wrap. Let it rise in a warm, draft-free area for about 1 hour or until the dough has doubled in size. This is where the magic happens—allowing the yeast to ferment and make the dough rise.
Step 5: Shape the Dough
- Punch Down the Dough: After the dough has risen, punch it down gently to release any trapped air. This will help create a more even texture in the bread.
- Shape the Dough: Turn the dough out onto a floured surface again and shape it into a loaf. Fold the edges of the dough toward the center, then roll it into a log shape. Place the dough into a lightly greased loaf pan, pressing it into the corners.
Step 6: Second Rise
- Second Rise: Cover the loaf pan with a clean towel and let it rise for another 30 minutes or until the dough has risen to the top of the pan. This second rise helps the bread become airy and light.
Step 7: Bake the Bread
- Preheat the Oven: While the dough is rising, preheat your oven to 375°F (190°C).
- Bake: Once the dough has risen, place the loaf in the oven and bake for 30-35 minutes, or until the top is golden brown, and the loaf sounds hollow when tapped on the bottom. You can also use a kitchen thermometer—when inserted into the center of the bread, it should read about 190°F (88°C).
- Optional: For a soft crust, brush the top of the loaf with melted butter right after removing it from the oven. This step adds flavor and gives the loaf a glossy finish.
Step 8: Cool and Slice
- Cool the Bread: Let the bread cool in the pan for about 10 minutes before transferring it to a wire rack to cool completely. This helps prevent the bread from becoming too soggy.
- Slice and Serve: Once the bread is cool enough to handle, slice it into pieces. Serve it fresh or toast it for a warm, crispy treat.
Why You’ll Love Homemade Bread:
- Simple Ingredients: You only need a few pantry staples, and you can make your own bread without any special equipment. No bread machine or stand mixer required!
- Customizable: Want to add herbs, cheese, or seeds? Go ahead! This recipe is a great base for experimenting with different flavors and ingredients. You can even try whole wheat flour or add a bit of honey for sweetness.
- Affordable: Making your own bread is not only fun, but it’s also cost-effective. Store-bought bread can be expensive, especially artisanal loaves, but with this simple recipe, you can bake fresh bread at home for a fraction of the cost.
- Fresh and Delicious: The taste of homemade bread is unbeatable. You can enjoy it while it’s warm from the oven with butter or use it for sandwiches, toast, or as a side to soups and salads.
Tips for the Best Homemade Bread:
- Don’t Skip the Rising Time: Patience is key! The longer the dough has to rise, the fluffier and lighter the bread will be. Make sure to let the dough rise until it’s doubled in size.
- Check for Doneness: If you’re unsure whether the bread is done, tap the bottom of the loaf. It should sound hollow. If not, return it to the oven for a few more minutes.
- Storage: Store your homemade bread in a breadbox or wrapped in a clean kitchen towel. It’s best enjoyed within a few days, but you can also freeze it for later. Just slice it before freezing so you can pull out individual slices as needed.
Conclusion:
Baking Homemade Bread is a rewarding and satisfying experience that fills your home with warmth and delightful aromas. With just a few ingredients, a little bit of time, and some patience, you can create a loaf that’s fresh, soft, and absolutely delicious. Whether you’re a seasoned baker or a beginner, this recipe is simple enough for anyone to try—and the results are truly worth it. Happy baking! 🍞✨
ADVERTISEMENT
