ADVERTISEMENT
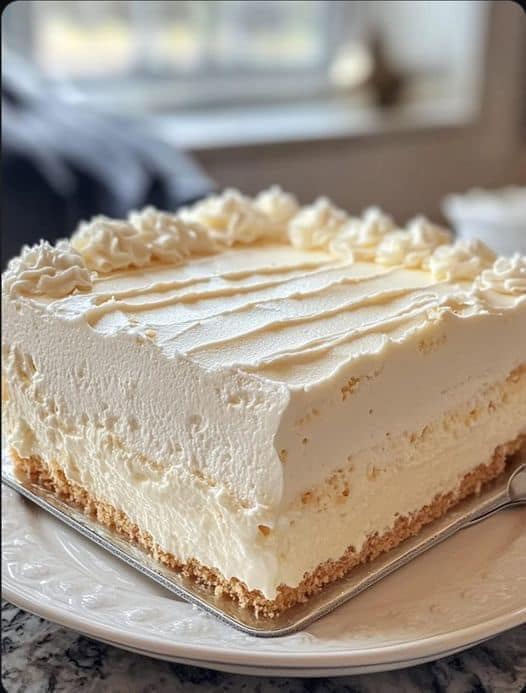
Instructions for Making Heavenly No-Bake Creamy Vanilla Cheesecake
Creating this Heavenly No-Bake Creamy Vanilla Cheesecake is a straightforward process, but the result is nothing short of spectacular. Here’s a simple step-by-step guide to making this dreamy dessert:
Step 1: Prepare the Crust
- Crush the Graham Crackers: Begin by placing the graham crackers in a ziplock bag and crushing them with a rolling pin, or use a food processor to pulse them into fine crumbs. You should have about 1 1/2 cups of crumbs.
- Mix the Crust Ingredients: In a bowl, combine the graham cracker crumbs, granulated sugar, and melted butter. Stir until the mixture is well combined and the crumbs are evenly coated with the butter.
- Press the Crust into a Pan: Pour the crust mixture into a 9-inch springform pan (or pie dish if preferred). Use the back of a spoon or your fingers to press the crumbs firmly into the bottom of the pan, ensuring it’s even and compact.
- Chill the Crust: Place the crust in the refrigerator for at least 30 minutes to allow it to set and firm up while you prepare the filling.
Step 2: Make the Cheesecake Filling
- Beat the Cream Cheese: In a large mixing bowl, beat the softened cream cheese with an electric mixer on medium speed until it’s smooth and creamy. Scrape down the sides of the bowl as needed.
- Whip the Cream: In a separate bowl, whip the heavy cream with the powdered sugar until stiff peaks form. This will give the cheesecake its light, airy texture.
- Combine the Mixtures: Gently fold the whipped cream into the cream cheese mixture until fully combined. Be careful not to deflate the whipped cream; you want to maintain its fluffy texture.
- Add Vanilla and Lemon: Stir in the vanilla extract and lemon juice (if using). The vanilla provides a warm, aromatic flavor, while the lemon juice adds a subtle tang that enhances the overall taste of the cheesecake.
- Optional Sour Cream: For an even creamier texture, you can add sour cream at this stage, which will also give the cheesecake a slightly tangy flavor, balancing the sweetness.
Step 3: Assemble the Cheesecake
- Fill the Crust: Once the crust has chilled and set, spoon the cheesecake filling onto the crust. Use a spatula to spread it out evenly, smoothing the top as you go.
- Chill the Cheesecake: Cover the cheesecake with plastic wrap or a lid, and return it to the refrigerator. Let it chill for at least 4 hours, or preferably overnight, to allow the flavors to meld and the filling to set completely.
Step 4: Add Toppings and Serve
- Add Your Toppings: Once the cheesecake is fully set, top it with your desired toppings. Fresh berries, a drizzle of caramel sauce, chocolate shavings, or whipped cream all make beautiful and delicious additions.
- Serve and Enjoy: Carefully release the sides of the springform pan, slice the cheesecake, and serve chilled. Your guests will be impressed by the smooth, rich texture and decadent flavor of this no-bake dessert.
Tips for Success
- Soften the Cream Cheese: Make sure the cream cheese is softened to room temperature before mixing. This ensures a smooth filling without lumps. Take the cream cheese out of the fridge about 30 minutes before you start preparing the cheesecake.
- Chill the Cheesecake Well: Allow enough time for the cheesecake to chill completely. This is what helps the filling firm up and ensures the cheesecake holds its shape when sliced.
- Customize the Crust: While graham cracker crust is classic, you can also experiment with other options like digestive biscuits, vanilla wafer cookies, or even Oreo cookies for a chocolatey twist.
- Flavor Variations: For a flavored twist, try adding a spoonful of fruit preserves or extracts like almond, orange, or coffee to the filling. You can also swirl in some melted chocolate or fruit puree for extra flavor.
- Make It Ahead: This cheesecake is a great make-ahead dessert. In fact, the longer it sits in the fridge, the more the flavors develop. It’s a perfect choice for parties, potlucks, or busy days when you want to prepare dessert in advance.
Why Heavenly No-Bake Creamy Vanilla Cheesecake is Perfect for Any Occasion
This Heavenly No-Bake Creamy Vanilla Cheesecake is ideal for almost any occasion. It’s an elegant dessert that doesn’t require hours of baking or complicated techniques, making it perfect for beginners or busy cooks. Whether you’re celebrating a birthday, a holiday, or simply want to treat your family to something special, this cheesecake delivers every time.
Its creamy texture and light flavor make it a refreshing choice after a hearty meal, while the no-bake method means it can be prepared in advance, giving you more time to enjoy your event. The versatility of the cheesecake also means it can be tailored to any season or celebration with the right toppings or flavor variations.
Final Thoughts
There’s something truly special about a Heavenly No-Bake Creamy Vanilla Cheesecake. With its light, fluffy filling, buttery graham cracker crust, and endless customization options, it’s sure to be a hit at any gathering. Plus, the no-bake process makes it an incredibly simple dessert to prepare, leaving you more time to relax and enjoy with friends and family.
With just a few basic ingredients, you can create a rich, decadent dessert that’s creamy, sweet, and completely satisfying. Try it today, and discover why this cheesecake is bound to become your new favorite go-to dessert!
ADVERTISEMENT
