ADVERTISEMENT
Step-by-Step Instructions for Easy Cheesy Garlic Bread
Step 1: Preheat the Oven
Preheat your oven to 375°F (190°C). This temperature is perfect for creating a golden, crispy crust while ensuring the cheese melts beautifully.
Step 2: Prepare the Bread
Slice your loaf of French bread into 1-inch thick slices. If you prefer individual pieces, you can also cut the loaf in half lengthwise for a more rustic presentation. Place the slices on a baking sheet lined with parchment paper or aluminum foil to make cleanup easier.
Step 3: Make the Garlic Butter Spread
In a medium-sized bowl, combine the softened butter with the minced garlic. Mix them together until the garlic is well incorporated into the butter. If you prefer a stronger garlic flavor, feel free to add more cloves!
Next, stir in the grated Parmesan cheese and dried oregano (if using). This combination will create a rich, savory spread that brings the perfect balance of garlic, cheese, and herbs.
Step 4: Spread the Garlic Butter
Generously spread the garlic butter mixture onto each slice of bread. Be sure to cover the surface well to ensure every bite is packed with flavor. If you’re making a whole loaf, be sure to spread the butter on both halves or each individual slice.
Step 5: Add the Mozzarella Cheese
Now comes the best part — adding the shredded mozzarella cheese! Sprinkle a generous amount of cheese over each slice of bread. You can add as much or as little as you prefer. For a cheesier bread, pile it on! The mozzarella will melt beautifully as it bakes, giving the bread a gooey, cheesy center.
Step 6: Bake the Cheesy Garlic Bread
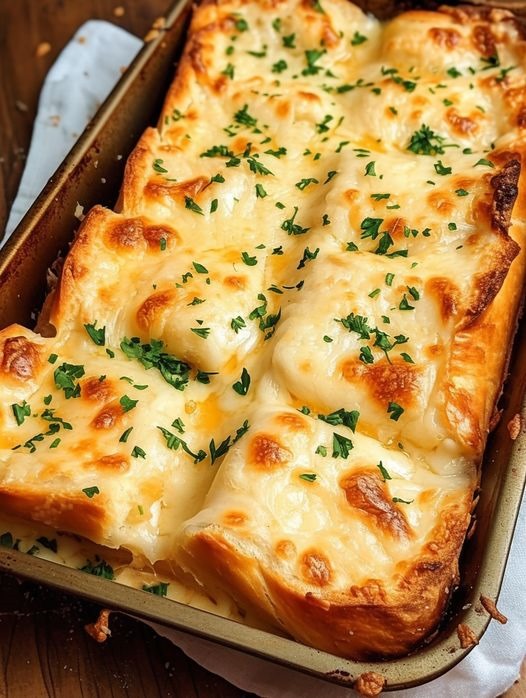
Place the baking sheet in the preheated oven and bake for 10-12 minutes, or until the edges of the bread are golden brown and the cheese is melted and bubbly. If you want your cheese to be extra golden, you can turn on the broiler for the last 1-2 minutes, but make sure to keep an eye on it to prevent burning.
Step 7: Garnish and Serve
Once the cheesy garlic bread is done baking, remove it from the oven and let it cool for a minute. Garnish with freshly chopped parsley for a burst of color and a hint of freshness. Serve immediately while it’s warm and gooey!
Pro Tips for Perfect Cheesy Garlic Bread
- Use fresh garlic: Fresh garlic gives the bread that bold, aromatic flavor that makes garlic bread so irresistible. Avoid garlic powder for a more authentic taste.
- Choose the right bread: A crusty French bread works best, but you can also use Italian bread or a baguette. If you like soft bread, opt for sandwich bread, but the crusty varieties give a nice contrast to the creamy cheese.
- More cheese, please: If you’re a cheese lover, feel free to experiment with different cheeses. Cheddar, gouda, or provolone are excellent choices for adding depth and flavor to your cheesy garlic bread.
- Broil for extra crispiness: If you like your bread extra crispy, finish it under the broiler for the last 1-2 minutes. Just keep an eye on it to prevent burning.
- Add toppings: For an extra flavor boost, sprinkle some red pepper flakes for heat, or add a drizzle of olive oil or balsamic glaze before serving.
Serving Suggestions
This easy cheesy garlic bread pairs wonderfully with a variety of dishes. Here are a few ways to enjoy it:
- With Pasta: Serve alongside your favorite pasta, like spaghetti, lasagna, or fettuccine Alfredo.
- With Soup: It’s perfect as a side to creamy soups such as tomato bisque, broccoli cheddar, or potato leek.
- As a Snack: Enjoy it as a quick snack or appetizer while you’re waiting for dinner to cook.
- With Salad: Serve it with a fresh green salad for a complete meal.
How to Store and Reheat Leftovers
If you happen to have leftovers (though we doubt you will!), store your cheesy garlic bread in an airtight container at room temperature for up to 1 day. You can also wrap it tightly in aluminum foil and store it in the refrigerator for up to 3 days.
To reheat, simply place the bread back in a preheated oven at 350°F (175°C) for 5-10 minutes or until warm. If you want to restore the crispiness, pop it under the broiler for 1-2 minutes.
Conclusion: A Simple and Irresistible Side Dish
This Easy Cheesy Garlic Bread is the perfect side dish for almost any meal. It’s quick, simple, and bursting with flavor — plus, it’s a crowd-pleaser! Whether you’re enjoying it with pasta, soup, or on its own, this cheesy garlic bread is bound to become a family favorite. With just a few ingredients and a little bit of time, you can create a delicious, comforting dish that everyone will love. So next time you’re in need of a flavorful side, give this cheesy garlic bread a try — you won’t be disappointed!
ADVERTISEMENT
