ADVERTISEMENT
- Cotton cloth or paper towels
- A non-abrasive sponge or soft brush
- Water (preferably distilled, if available)
- A bowl or small dish
Step-by-Step Guide to Cleaning Your Iron:
Step 1: Unplug and Prepare the Iron
Safety first! Before you start cleaning, make sure the iron is unplugged and has cooled down completely. This will prevent any accidents and burns while you work.
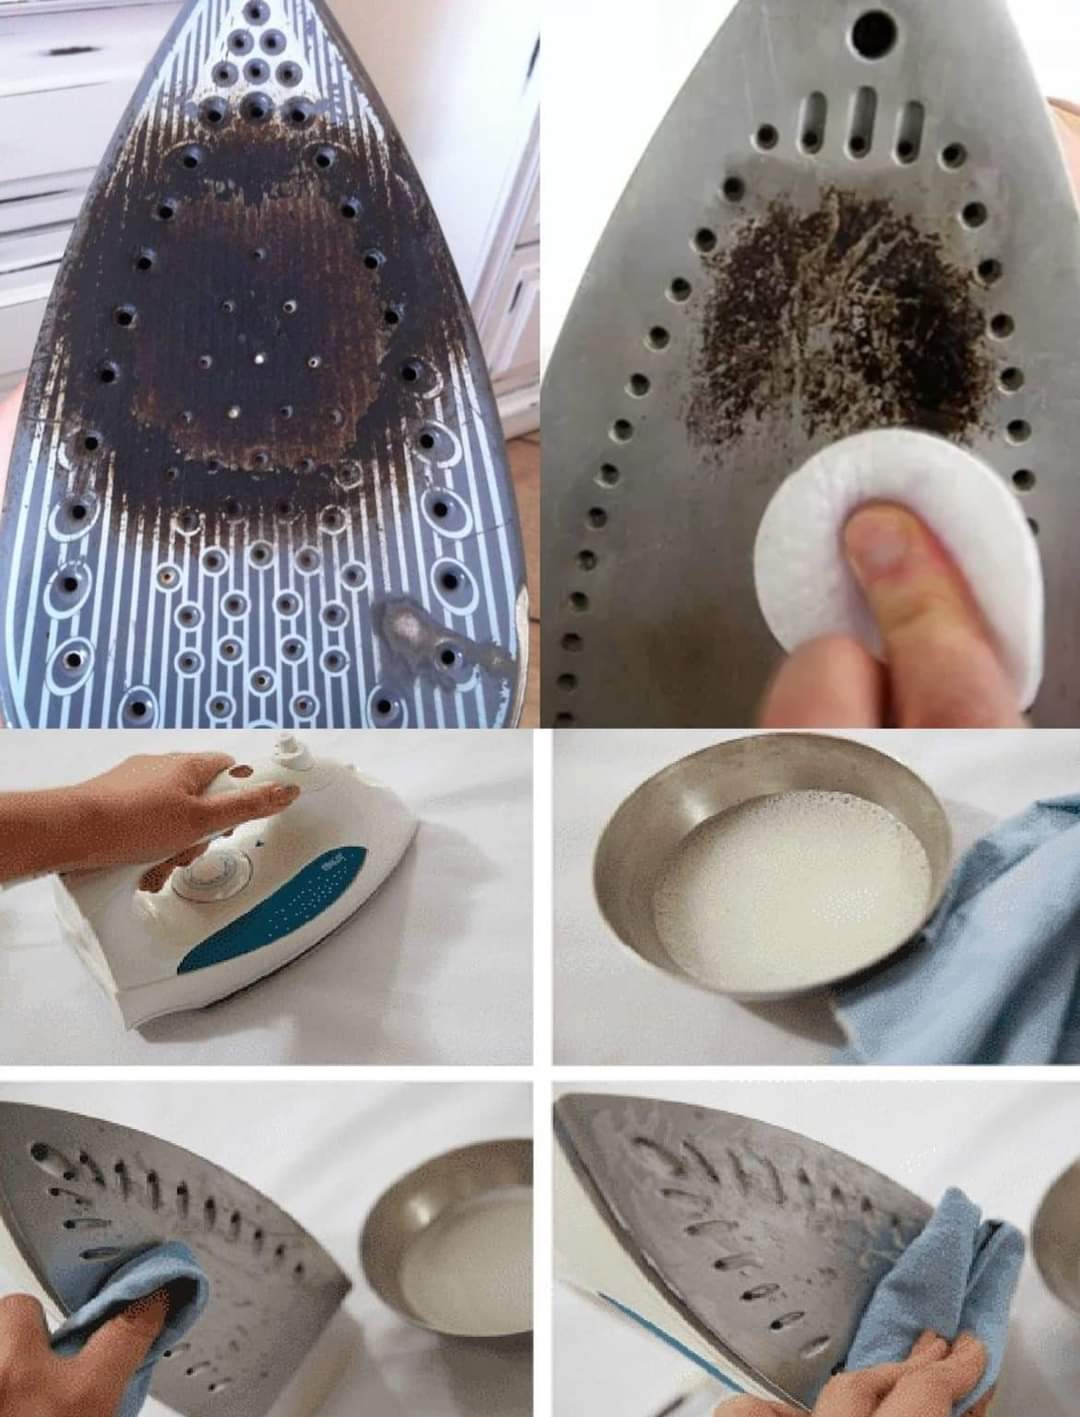
Step 2: Clean the Soleplate (The Bottom)
The soleplate (or the bottom part of the iron) is where most of the gunk and grime builds up. Over time, mineral deposits, starch, and fabric fibers can stick to the plate, causing it to get sticky or dirty.
- Create a Baking Soda Paste: Mix 2 tablespoons of baking soda with a small amount of water to form a thick paste.
- Apply the Paste: Use a cotton cloth or sponge to apply the baking soda paste directly to the soleplate of the iron. Gently scrub the surface, focusing on areas with heavy build-up.
- Wipe Off: Once you’ve scrubbed away the grime, use a clean, damp cloth to wipe off the paste and any loosened residue.
For stubborn spots or scorched areas, try using a non-abrasive sponge or a soft brush to scrub the surface gently. Never use steel wool or harsh scrubbers, as they can scratch and damage the soleplate.
Step 3: Clean the Steam Holes
If your iron has steam holes, these can quickly get clogged with mineral deposits, especially if you’ve used tap water. Fortunately, the laundromat method offers a simple fix.
- White Vinegar and Water Solution: Mix equal parts white vinegar and water in a bowl. This solution helps dissolve mineral deposits and keep the steam holes clear.
- Soak a Cloth: Dip a cotton cloth or paper towel into the vinegar-water mixture, wring it out, and place it over the steam holes.
- Let It Sit: Let the cloth sit on the iron for 10-15 minutes to allow the vinegar to break down any mineral build-up.
- Wipe Clean: After the vinegar has had time to work, use a clean, damp cloth to wipe away any remaining residue.
Step 4: Clean the Water Reservoir
The water tank of the iron is another area that can accumulate mineral deposits, especially if you use hard water. To clean it, you’ll need to do a “self-cleaning” cycle:
- Fill the Reservoir: Fill the water tank halfway with equal parts white vinegar and distilled water.
- Turn the Iron On: Plug in the iron, set it to a low heat setting, and allow it to heat up. Once it’s warm, turn on the steam function to release the vinegar-water solution through the steam holes.
- Flush the Tank: Hold the iron over a sink and release the steam until the water tank is empty. This process helps remove any mineral deposits that have accumulated inside the iron.
- Rinse: After the vinegar solution has been expelled, fill the tank with clean distilled water and repeat the steam cycle to flush out any remaining vinegar.
Step 5: Final Wipe and Polish
Now that the soleplate, steam holes, and water reservoir are clean, give your iron a final wipe-down with a clean cloth to remove any remaining vinegar or baking soda. For a polished finish, you can buff the soleplate with a soft cloth.
Additional Tips for Iron Maintenance
- Use Distilled Water: If possible, always use distilled water in your iron. This helps prevent mineral build-up inside the water tank and steam holes.
- Regular Cleaning: Perform this cleaning method every few months or as needed to maintain optimal performance. For frequent ironers, a quarterly cleaning should suffice.
- Prevent Rusting: To avoid rust on the soleplate, store your iron in a dry, cool place. Avoid leaving water in the tank when you store it.
- Avoid Harsh Chemicals: Always stick to natural cleaning agents like vinegar and baking soda to clean your iron. Harsh chemicals can damage the soleplate or leave behind residues.
Conclusion
The Laundromat Method is a simple yet effective way to clean your dirty iron and restore it to a like-new condition. By following these steps and using natural ingredients like baking soda and vinegar, you can remove grime, mineral deposits, and stains from your iron without any specialized cleaning products. With just a little effort, your iron will be ready to glide smoothly over fabrics, leaving your clothes crisp and wrinkle-free. Happy ironing!
ADVERTISEMENT
ADVERTISEMENT
