ADVERTISEMENT
2. The Quick and Easy Pre-Clean
The first step is the “quick wipe-down” method, something every chef knows and loves for its speed and effectiveness.
- Remove Grates and Burner Caps: Start by carefully removing the grates and burner caps from your gas stove. These are the most prone to build-up and need the most attention.
- Soak for Easy Scrubbing: Place the burner grates and caps in a basin or sink filled with warm soapy water. If there’s a lot of grease and grime, add a bit of baking soda to the mix. Let them soak while you tackle the stove surface.
- Wipe the Stove Surface: Use a microfiber cloth dampened with a mixture of dish soap and water (or a degreaser if things are extra grimy) to wipe down the stove’s surface. Pay attention to areas around the burners and control knobs, as grease tends to build up there, too.
- Scrape Away Stubborn Spots: For any areas with stuck-on food or grease, use a plastic scraper or spatula to gently lift the build-up. Avoid using metal scrapers, as they could scratch the surface.
3. Deep Clean with Baking Soda and Vinegar
Now it’s time to get into the deep clean, the method professional chefs often use to restore a stove to its original glory. Baking soda and vinegar are both natural and highly effective in removing burnt residue.
- Create a Baking Soda Paste: Sprinkle baking soda directly onto the stove surface, focusing on the areas that have accumulated grime or burn marks. For tougher spots, you can mix baking soda with a small amount of water to form a paste.
- Add Vinegar for a Fizzing Reaction: Lightly spray or sprinkle white vinegar over the baking soda paste. The combination of baking soda and vinegar will create a fizzing reaction that breaks down grease and food residues.
- Let It Sit: Allow the mixture to sit for 10-15 minutes. This gives the ingredients time to work their magic. While it’s resting, you can continue scrubbing the grates and burner caps that have been soaking in the soapy water.
- Scrub Away: After the paste has had time to sit, use a microfiber cloth, sponge, or toothbrush to scrub away the grime. For hard-to-reach corners, the toothbrush is perfect for detailed work. Be gentle to avoid scratching any surfaces.
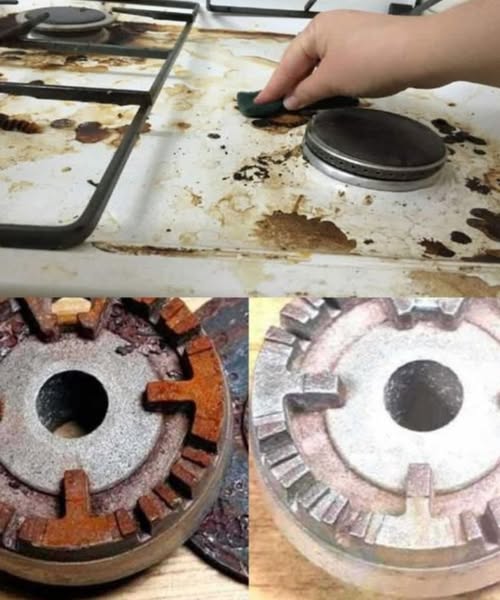
4. Burner Grates and Caps: The Extra Care
The burner grates and caps often require more intense scrubbing, especially if they’ve been burnt on for a long time. Here’s a method chefs swear by:
- Soak Longer for Stubborn Grime: If your grates and caps are still tough to clean after soaking, make a paste with baking soda and a bit of water. Spread it over the surface and let it sit for another 15-20 minutes.
- Use Aluminum Foil for Extra Power: For especially stubborn spots, crumple a piece of aluminum foil and use it as a scrubber. The foil will help to lift off burnt-on food without damaging the metal of the grates.
- Dry and Reassemble: Once all the grime has been scrubbed off, rinse the grates and caps thoroughly and dry them completely. Reassemble the burners and caps back onto the stove.
5. The Finishing Touches
After you’ve tackled the major cleaning, it’s time to focus on the finer details to give your stove that “just-polished” look:
- Clean the Control Knobs: Don’t forget to clean the control knobs, as they can accumulate oil and grime, too. Use a damp cloth and a small amount of dish soap, and wipe them thoroughly.
- Buff the Stove Surface: Finally, give the entire stove a good buffing with a clean, dry microfiber cloth. This will not only remove any remaining streaks or soap residue but also restore a shine to the surface.
Bonus Tip: Regular Maintenance
Chefs know that regular cleaning prevents the build-up of grease and grime, which makes deep cleans much easier. After every cooking session, take a few moments to wipe down the stove’s surface. You’ll prevent the hard-to-remove burnt stains from forming and keep your kitchen looking fresh.
Conclusion
Cleaning a dirty and burnt gas stove doesn’t have to be a difficult task. With the right methods and tools, you can restore your stove to its sparkling clean state in no time. Professional chefs have long known that a combination of patience, the right ingredients (like baking soda and vinegar), and a little elbow grease can go a long way. By using these simple, chef-approved cleaning techniques, you’ll have your stove shining effortlessly—ready for your next culinary masterpiece.
ADVERTISEMENT
ADVERTISEMENT
