ADVERTISEMENT
Instructions for Making Danish Rolls with Cream and Raisins
Step 1: Prepare the Dough
- Activate the Yeast – In a small bowl, combine warm water, warm milk, and granulated sugar. Stir in the yeast and let it sit for about 5-10 minutes until the mixture becomes frothy. This shows that the yeast is active and ready to go.
- Mix the Dough – In a large bowl, whisk together the flour, salt, and lemon zest (if using). Add the yeast mixture, eggs, and vanilla extract. Stir until the dough starts to come together.
- Knead the Dough – Turn the dough out onto a floured surface and knead it for about 8-10 minutes until it’s smooth and elastic. You can also use a stand mixer with a dough hook to knead the dough for you.
- Add the Butter – Gradually add the softened butter and continue kneading until the butter is fully incorporated and the dough is soft and elastic.
- First Rise – Shape the dough into a ball and place it in a lightly oiled bowl. Cover it with a damp towel or plastic wrap and let it rise for about 1-1.5 hours, or until it has doubled in size.
Step 2: Make the Cream Filling
- In a mixing bowl, combine the heavy cream, cream cheese, and powdered sugar.
- Whisk until the mixture is smooth and well combined. You can also use a hand mixer to get a lighter, fluffier texture.
- Stir in the vanilla extract and fold in the soaked and drained raisins. The raisins add a delightful burst of sweetness in every bite.
Step 3: Shape the Danish Rolls
- Preheat the Oven – Preheat your oven to 375°F (190°C).
- Roll Out the Dough – Once the dough has risen, punch it down to release the air, then turn it onto a lightly floured surface. Roll the dough into a rectangle about 1/4-inch thick.
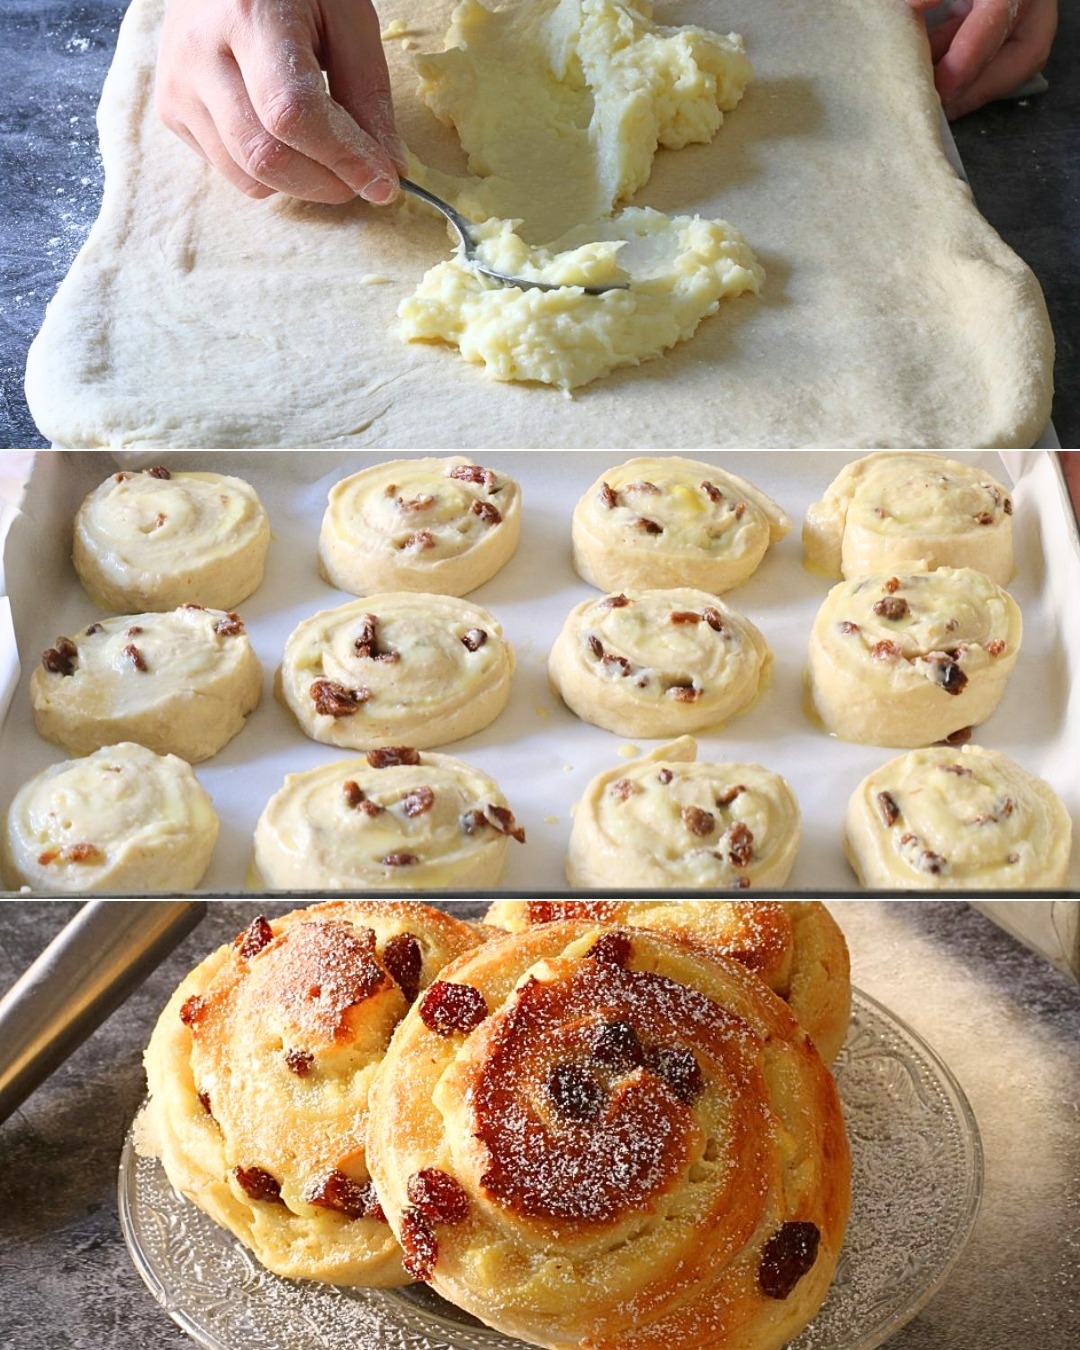
- Spread the Cream Filling – Evenly spread the prepared cream filling over the entire surface of the dough, leaving about a 1-inch border around the edges.
- Add Raisins – Sprinkle a few additional raisins over the filling for an extra burst of flavor.
- Roll and Slice – Starting from one long edge, roll the dough up tightly into a log shape. Slice the dough into 1-inch thick pieces and place them on a parchment-lined baking sheet.
Step 4: Second Rise and Bake
- Let the Rolls Rise Again – Cover the rolls with a towel or plastic wrap and let them rise for another 30-40 minutes until they’ve puffed up.
- Bake the Rolls – Bake in the preheated oven for 18-22 minutes or until they are golden brown on top and the filling is bubbling slightly.
- Cool and Serve – Let the Danish rolls cool for about 10 minutes before serving. You can also drizzle them with a light glaze made from powdered sugar and milk for an extra touch of sweetness.
Serving Suggestions
- Enjoy with Coffee or Tea – These rolls are perfect with a hot cup of coffee, tea, or hot chocolate.
- Serve for Brunch – These Danish rolls are ideal for a weekend brunch with friends or family. Pair them with fresh fruit or a salad for a well-rounded meal.
- Perfect for Special Occasions – These rolls can also be a special treat for holidays, birthdays, or any gathering where you want to impress your guests with something homemade and delicious.
Tips and Variations
- Add Nuts – For an extra crunch, consider adding chopped walnuts or pecans to the filling.
- Use Other Dried Fruits – Feel free to substitute raisins with other dried fruits like cranberries, currants, or even dried apricots.
- Make a Glaze – For an extra layer of sweetness, drizzle the rolls with a simple vanilla glaze (powdered sugar, vanilla extract, and milk) once they’ve cooled.
- Double the Recipe – These rolls freeze well, so you can make a large batch and freeze the leftovers for later. Just wrap them tightly in plastic wrap and place them in a freezer bag.
Final Thoughts
These Danish Rolls with cream and raisins are a perfect combination of flaky, buttery dough and sweet, creamy filling. Whether you’re baking for a special occasion or just looking for a comforting treat, this recipe is sure to become a favorite. Easy to make and impossible to resist, these rolls are perfect for any time of day and are sure to bring a smile to your face with every bite.
So, grab your apron and get ready to bake a batch of these delightful treats that are bound to fill your kitchen with irresistible aromas. Enjoy! 🥐🍇
ADVERTISEMENT
