ADVERTISEMENT
Step 2: Shape the Biscuits
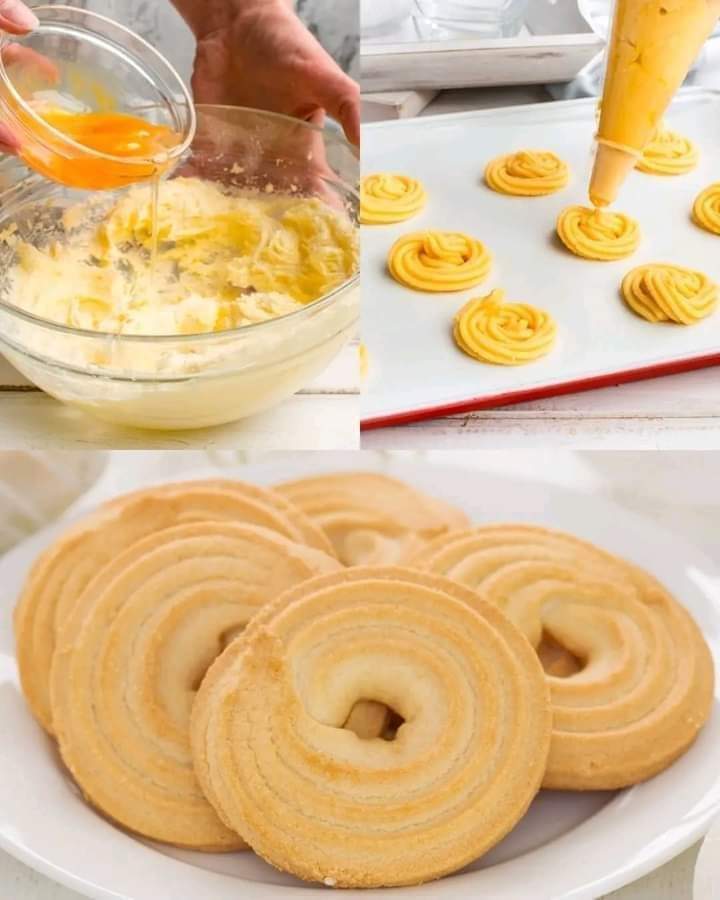
Now that the dough is ready, you can begin shaping your biscuits. Roll the dough into small balls, about 1 tablespoon in size. Place them onto the prepared baking sheet, spacing them about 2 inches apart to allow for slight spreading during baking.
To give the biscuits their signature shape, you can flatten the tops of the dough balls gently with the back of a fork, creating a crisscross pattern or simple indentations.
Alternatively, if you prefer a more traditional look, you can pipe the dough into rounds or shapes using a piping bag fitted with a star nozzle for a decorative effect.
Step 3: Bake the Biscuits
Place the tray in the preheated oven and bake for about 12-15 minutes, or until the biscuits are golden brown around the edges. Keep an eye on them towards the end to ensure they don’t overbake—these biscuits are meant to be light, crisp, and slightly golden, not too dark.
Step 4: Cool and Serve
Once the biscuits are done baking, remove them from the oven and let them cool on the baking sheet for a few minutes before transferring them to a wire rack to cool completely. This ensures they maintain their delicate crispness.
Once cooled, these buttery biscuits are ready to be enjoyed with your favorite hot beverage or as a stand-alone treat!
Tips for the Perfect Danish Butter Biscuits
- Use Room Temperature Butter: Make sure your butter is soft but not melted. Room temperature butter creams better with sugar and helps create a smooth dough.
- Don’t Overmix: Overworking the dough can make the biscuits tough. Mix just until the ingredients are combined, and stop once the dough comes together.
- Chill the Dough (Optional): If you find the dough is too soft to handle, wrap it in plastic wrap and chill it in the fridge for about 30 minutes before shaping the biscuits. This will make it easier to form neat shapes and prevent the biscuits from spreading too much in the oven.
- Customize the Flavor: Feel free to add a bit of lemon zest, almond extract, or cinnamon to give the biscuits a different flavor profile.
- Decorate: While these biscuits are lovely on their own, you can decorate them with a simple glaze, chocolate drizzle, or a sprinkle of colorful sugar to make them extra special for holidays or special occasions.
Why You’ll Love Danish Butter Biscuits:
- Simple, But Elegant: These biscuits have a refined yet simple charm that makes them perfect for any occasion. The rich buttery flavor is comforting, while the crisp texture adds a touch of elegance to your tea-time treat.
- Perfect for Gifting: Packaged in a tin or box, these homemade biscuits make a thoughtful and personal gift for birthdays, holidays, or just to show someone you care.
- Quick and Easy: Despite their sophisticated flavor, Danish Butter Biscuits are incredibly easy to make, requiring minimal ingredients and just a few steps.
- Crowd-Pleaser: Their buttery goodness makes them a crowd favorite. Serve them at a party, alongside a warm beverage, or as a light dessert after a meal.
- Timeless: This recipe for Danish Butter Biscuits has stood the test of time for a reason—it’s a classic. Once you try them, they’ll likely become a staple in your baking rotation.
Final Thoughts:
Danish Butter Biscuits are the epitome of simplicity and elegance in the world of cookies. With their melt-in-your-mouth texture and rich, buttery flavor, they’re sure to become a favorite treat in your household. Whether enjoyed with a hot cup of tea, shared with friends and family, or packaged as a thoughtful gift, these biscuits are the perfect way to indulge in something sweet. Try baking them today, and enjoy the simple pleasure of homemade Danish butter biscuits!
ADVERTISEMENT
