ADVERTISEMENT
Instructions:
Step 1: Activate the Yeast
- Prepare the Yeast: In a small bowl, combine the warm water, sugar, and active dry yeast. Stir gently and let the mixture sit for about 5-10 minutes until it becomes frothy. This step ensures the yeast is active and ready to help the bread rise.
Step 2: Mix the Dough
- Combine Dry Ingredients: In a large bowl, whisk together the flour and salt.
- Add the Yeast Mixture: Once the yeast is activated and frothy, pour it into the bowl with the flour mixture. Add the softened butter and begin mixing the ingredients with a wooden spoon or a dough hook if you’re using a stand mixer.
Step 3: Knead the Dough
- Knead the Dough by Hand: Turn the dough out onto a lightly floured surface and knead for about 8-10 minutes. Use the heel of your hands to push the dough away from you, then fold it back toward you and turn it slightly. Repeat this motion until the dough becomes smooth and elastic.
- Knead with a Stand Mixer: If you’re using a stand mixer, attach the dough hook and knead on low speed for 6-7 minutes, until the dough is smooth and elastic.
Step 4: Let the Dough Rise
- Shape the Dough: Once the dough is kneaded, shape it into a ball and place it in a lightly greased bowl. Cover with a damp towel or plastic wrap.
- First Rise: Let the dough rise in a warm place for 1 to 1 1/2 hours, or until it has doubled in size. This is when the yeast works its magic, making the dough light and airy.
Step 5: Punch Down and Shape the Dough
- Deflate the Dough: After the dough has risen, punch it down gently to release the air bubbles.
- Shape the Loaf: Turn the dough out onto a floured surface and shape it into a loaf. To do this, gently flatten the dough into a rectangle, then fold the edges inward and roll it tightly into a cylinder. Pinch the seams together to seal.
Step 6: Second Rise
- Prepare the Pan: Grease a 9×5-inch loaf pan with butter or oil. Place the shaped dough into the pan, ensuring it fits snugly.
- Let the Dough Rise Again: Cover the pan with a clean towel and let the dough rise for another 30-45 minutes, or until it has risen slightly above the edges of the pan.
Step 7: Bake the Bread
- Preheat the Oven: Preheat your oven to 375°F (190°C).
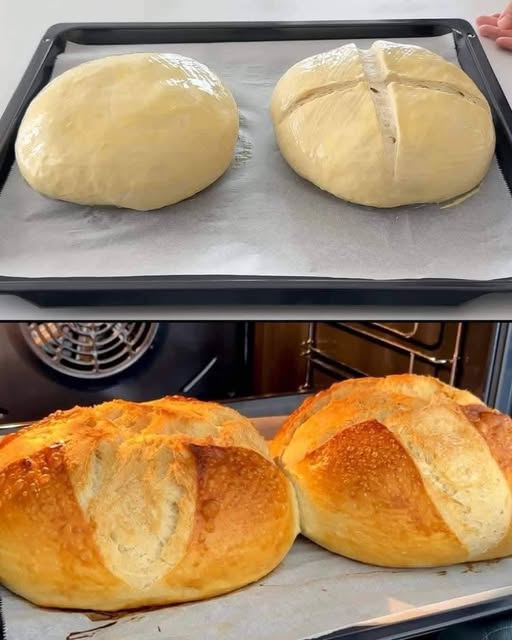
- Bake the Loaf: Once the dough has risen, place the loaf in the preheated oven and bake for 25-30 minutes, or until the top is golden brown and the loaf sounds hollow when tapped on the bottom.
- Optional: For a softer crust, brush the top of the loaf with a bit of melted butter immediately after baking.
Step 8: Cool and Slice
- Cool the Bread: Remove the bread from the oven and let it cool in the pan for 5 minutes. Then, turn the bread out onto a wire rack to cool completely before slicing.
- Slice and Enjoy: Once the bread has cooled to room temperature, slice it with a serrated knife and enjoy!
Tips for Success:
- Use Room Temperature Ingredients: Make sure your butter is softened and your water is warm (but not hot) to help the yeast activate properly.
- Don’t Overwork the Dough: Be gentle while kneading and shaping the dough. Overworking it can lead to a denser loaf.
- Ensure the Right Temperature for Rising: If your kitchen is cold, you can create a warm environment for the dough by turning on your oven for a few minutes, then turning it off before placing the dough inside to rise.
- Freezing Leftovers: If you don’t finish the loaf right away, wrap it tightly in plastic wrap and store it in the freezer for up to a month. To thaw, simply let it sit at room temperature for a few hours.
Why Classic Homemade Bread is Perfect for Any Occasion:
Classic Homemade Bread is incredibly versatile and works for just about any occasion. It’s perfect for breakfast, whether you’re making toast with jam or enjoying a slice with a cup of coffee. It’s also a great addition to soups, stews, or salads, adding texture and flavor. And, of course, it’s fantastic for sandwiches—whether you’re making a hearty turkey club or a simple PB&J, this bread will elevate any filling.
Conclusion:
There’s something truly special about baking Classic Homemade Bread from scratch. It’s an incredibly rewarding process that fills your home with the comforting aroma of fresh bread, and the results are always worth the effort. This recipe is perfect for beginners and seasoned bakers alike, offering a delicious, soft loaf that can be used in a variety of ways. So, gather your ingredients, take your time, and enjoy the timeless pleasure of baking bread in your own kitchen!
ADVERTISEMENT
ADVERTISEMENT
