ADVERTISEMENT
Instructions:
1. Prepare the Tree Base:
Start by deciding what type of base you’d like to use for your Christmas tree. A sugar cone is the most traditional choice, but you can also stack cupcakes or pound cake to form a tiered effect. If you’re using sugar cones, place them upside down on a plate or cake stand. For a more elaborate design, you can stack two or three cones, one on top of the other, to create a taller tree.
For a more substantial tree base, you can cut small circles from pound cake or cupcakes to serve as the tree’s “tiers.” Simply trim the cake layers into circles of different sizes and stack them on top of each other to form a layered tree shape.
2. Make the Green Frosting:
To create the green frosting for your Christmas tree, beat together the softened butter and powdered sugar until smooth. Add the milk, vanilla extract, and a few drops of green food coloring. Stir until the frosting is smooth and you have a bright, festive shade of green. If you need a stiffer consistency, add more powdered sugar; for a softer, spreadable texture, add a little more milk.
3. Frost the Christmas Tree:
Once your tree base is ready, it’s time to frost! Start by spreading a generous amount of green frosting all over the sugar cone or the layers of cake. Use a spatula or butter knife to smooth it out. Don’t worry if it looks a little rough around the edges—that’s part of the charm!
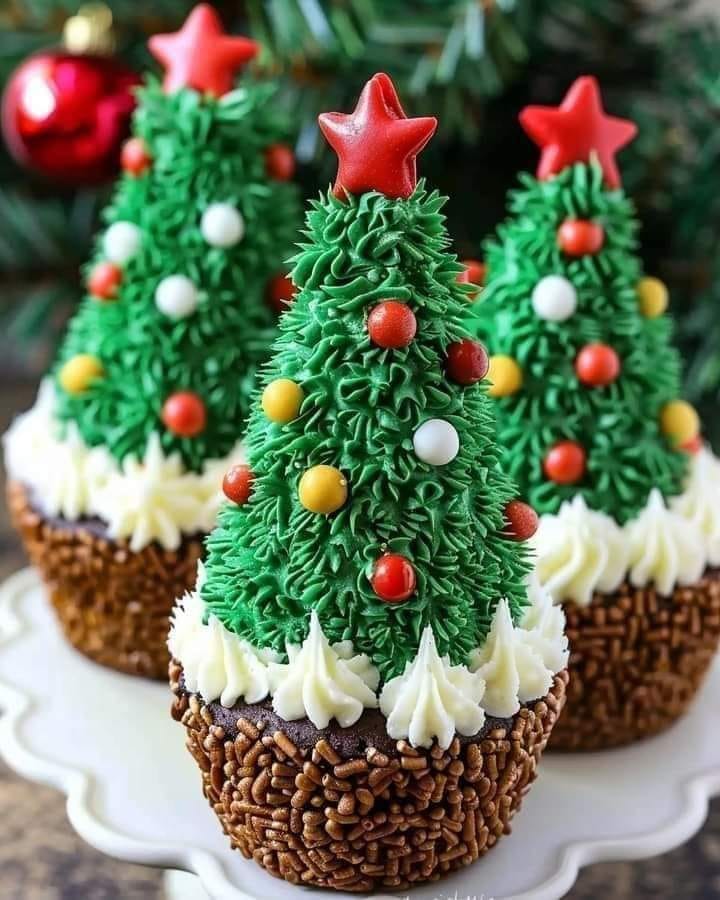
For a textured look, you can use a piping bag with a star tip to create a more decorative effect. Pipe the frosting in swirling motions from the base of the cone up to the top to mimic tree branches. If you’re using cake layers, pipe the frosting on each tier.
4. Decorate the Tree:
Now comes the fun part—decorating your tree! Get creative and use a variety of colorful candies to make your tree shine. Here are some ideas for decorating:
- Ornaments: Use M&Ms, chocolate chips, or gumdrops to create ornaments all over your tree.
- Candy Canes: Mini candy canes are perfect for hanging on the “branches” or as a decorative border around the base.
- Tinsel: Sprinkle edible glitter, silver dragees, or rainbow sprinkles to add some sparkle to your tree.
- Snow Effect: Dust the tree with powdered sugar or sprinkle shredded coconut for a “snowy” look.
- Tree Topper: No Christmas tree is complete without a star! Place a candy star or a star-shaped cookie on top for a finishing touch.
5. Add the Final Touches:
If you want to make your tree extra festive, you can even wrap some string lights around the base (battery-operated, of course) for a glowing effect. It’s a great way to make your tree sparkle even more, especially if you’re serving it in a dark room or at night.
6. Serve and Enjoy:
Once your Christmas Tree Dessert is beautifully decorated, it’s time to serve! Slice through the tree carefully if you’ve used cake layers, or let guests enjoy the cone structure as a fun, edible decoration. This dessert is sure to be the centerpiece of your holiday table!
Why You’ll Love This Christmas Tree Dessert:
- Fun to Make and Decorate: This dessert is perfect for getting the whole family involved. Kids will love decorating their own little tree, and it’s a great way to spend time together during the holiday season.
- Visually Stunning: With its vibrant green frosting, colorful candies, and sparkling decorations, this Christmas Tree Dessert is sure to impress your guests. It makes for a beautiful and festive centerpiece at any holiday party or gathering.
- Customizable: The beauty of this dessert is that it’s completely customizable. You can use store-bought or homemade frosting, choose your favorite candies, and adjust the size of the tree to fit your needs.
- Perfect for All Ages: This dessert appeals to kids and adults alike. It’s a great way to get everyone into the Christmas spirit with a fun and delicious holiday treat.
- Make Ahead: The Christmas Tree Dessert can be made ahead of time. Assemble the tree and store it in the refrigerator until you’re ready to serve, making it a great option for busy holiday schedules.
Tips for a Perfect Christmas Tree Dessert:
- Use a Sturdy Cone: When using sugar cones, be sure to pick cones that are sturdy enough to hold the frosting and decorations. Avoid using broken cones, as they may collapse under the weight of the frosting.
- Texture Matters: For a tree with more texture, try using a piping bag and star tip to create a beautiful tree shape with the frosting. It mimics the look of branches and gives your tree a more realistic, bumpy effect.
- Store Leftovers Properly: If you have any leftover tree (which is unlikely!), store it in an airtight container in the refrigerator. The cake or cone can dry out if left uncovered for too long.
- Get Creative with Decorations: You can also use mini cookies, marshmallows, or even small chocolate bars to decorate your tree. Feel free to get creative with your holiday treats!
Final Thoughts:
This Christmas Tree Dessert is a fun and festive way to bring holiday cheer to any celebration. Whether you’re serving it at a family gathering, holiday party, or just enjoying it as a special treat with loved ones, it’s sure to be a hit. With its easy assembly, endless decorating possibilities, and delicious flavors, this dessert is bound to become a cherished holiday tradition for years to come.
So gather your ingredients, get your decorating supplies ready, and create your very own edible Christmas tree today! Happy Holidays!
ADVERTISEMENT
