ADVERTISEMENT
Instructions for Making Chocolate Swiss Roll Cake:
1. Prepare the Baking Pan:
Start by preparing your baking pan. Line a 15×10-inch jelly roll pan with parchment paper, ensuring the paper covers the entire surface. This will help prevent the cake from sticking and make it easier to roll later.
2. Make the Cake Batter:
Preheat your oven to 350°F (175°C). In a large bowl, beat the eggs and sugar together until light and fluffy. This will take about 3-5 minutes using an electric mixer on high speed. Add the vanilla extract and mix until well incorporated.
In a separate bowl, sift the flour, cocoa powder, baking powder, and salt. Gradually fold the dry ingredients into the egg mixture using a spatula. Once combined, add the milk and melted butter to the batter and mix gently until smooth and well incorporated.
3. Bake the Cake:
Pour the batter into the prepared baking pan and spread it out evenly with a spatula. Bake the cake in the preheated oven for 12-15 minutes, or until a toothpick inserted into the center comes out clean. The cake should be soft, moist, and spring back when lightly touched.
4. Cool and Roll the Cake:
Once baked, remove the cake from the oven and allow it to cool for about 5 minutes. Then, place a clean kitchen towel on a flat surface and lightly dust it with powdered sugar. Gently invert the cake onto the towel, peeling off the parchment paper. While the cake is still warm, carefully roll it up (starting from one short end) along with the towel to prevent it from cracking. Let the rolled-up cake cool completely while resting in the towel. This process helps the cake maintain its shape and prevents it from cracking when you unroll it.
5. Make the Filling:
While the cake is cooling, prepare the filling. In a chilled mixing bowl, whip the heavy cream with the powdered sugar and vanilla extract until soft peaks form. This will create a light and fluffy whipped cream filling that complements the cake’s soft texture.
6. Unroll and Fill the Cake:
Once the cake is completely cooled, carefully unroll it from the towel. Spread a generous layer of whipped cream evenly over the surface of the cake, leaving a small border around the edges. You can also add chocolate ganache or fruit preserves if you prefer a different filling.
7. Roll the Cake Back Up:
After spreading the filling, carefully roll the cake back up, starting from the short side. Be gentle to avoid cracking. Once rolled, transfer the cake to a serving platter, seam side down, to keep it from unrolling.
8. Optional: Add a Chocolate Ganache:
If you want to add an extra layer of indulgence, make a simple chocolate ganache by heating the heavy cream in a small saucepan until it just begins to simmer. Pour it over the chopped chocolate and butter, stirring until smooth and glossy. Drizzle the ganache over the top of the rolled cake and let it set for a few minutes.
9. Slice and Serve:
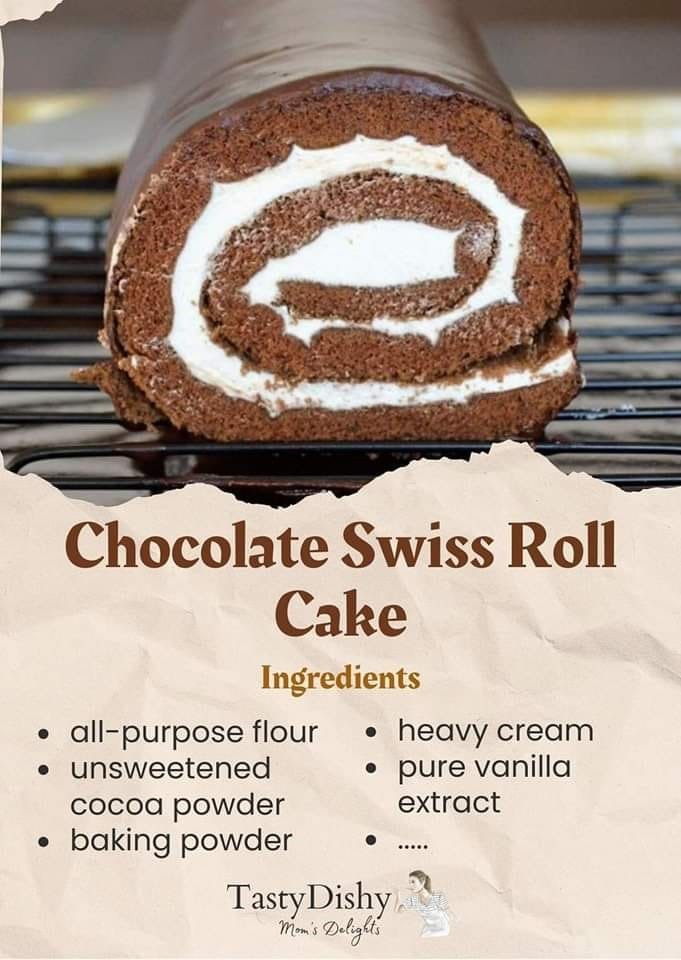
Slice the Chocolate Swiss Roll Cake into individual servings, showcasing the beautiful swirl pattern inside. Serve it as a dessert after a holiday meal or any time you want to enjoy a sweet, decadent treat.
Tips for Perfecting Your Swiss Roll Cake:
- Be Gentle When Rolling: When rolling the cake, make sure not to apply too much pressure. Roll it slowly and carefully to prevent it from cracking. The key is to allow it to cool in the towel so it holds its shape when unrolled.
- Use Room Temperature Eggs: For the best results, ensure your eggs are at room temperature before beating them. This helps the batter rise and creates a light, fluffy cake.
- Decorate with Powdered Sugar: For a simple and elegant touch, dust the finished cake with powdered sugar before serving. You can also add fresh berries or a drizzle of additional ganache for a beautiful presentation.
- Make Ahead: Swiss roll cakes can be made ahead of time and stored in the fridge for up to 2 days. Just be sure to wrap it tightly to prevent it from drying out.
Why Chocolate Swiss Roll Cake is a Must-Try:
The Chocolate Swiss Roll Cake is the perfect combination of lightness, richness, and flavor. It’s a versatile dessert that can be customized with different fillings and toppings, making it ideal for various occasions—from birthdays to festive holidays. Its tender chocolate sponge, paired with creamy filling and optional ganache, creates a dessert that’s both satisfying and visually stunning.
Whether you’re a beginner baker or an experienced pastry chef, this cake is a fun challenge with a rewarding result. So, roll up your sleeves and try making this beautiful dessert for your next special occasion. You’ll be sure to impress your guests with your baking skills and delicious results!
ADVERTISEMENT
