ADVERTISEMENT
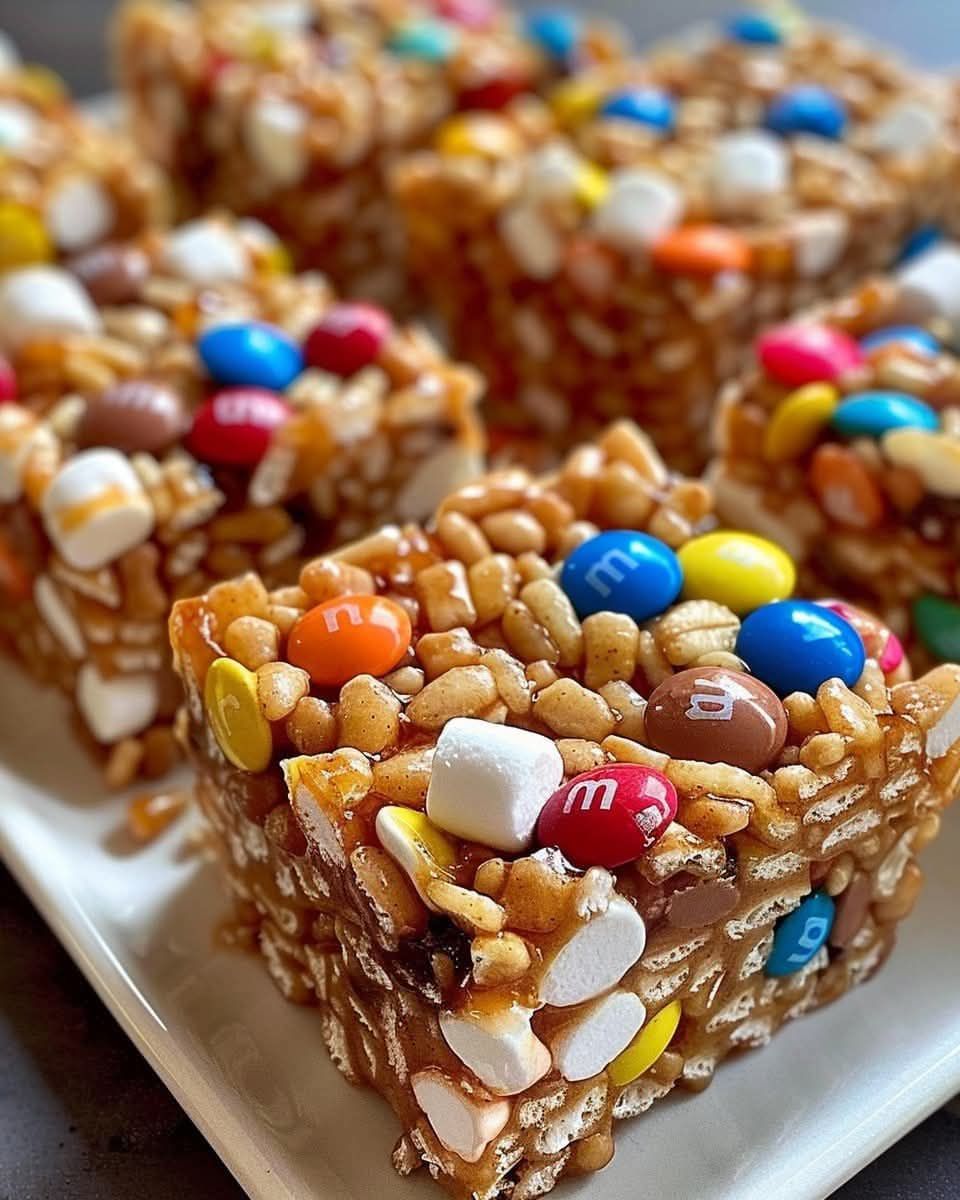
How to Make Candy Ribbon Crunch Bars
Step 1: Prepare the Pan
Start by lining a 9×9-inch square baking pan with parchment paper or lightly greasing it to prevent the bars from sticking. This will make it easy to remove the bars once they’re set.
Step 2: Melt the Peanut Butter, Butter, and Chocolate
In a medium saucepan, combine the white chocolate chips, peanut butter, and butter over low to medium heat. Stir constantly until the mixture is completely melted and smooth. You can use dark or milk chocolate if you prefer, but white chocolate adds a creamy sweetness that balances well with the crunch of the Rice Krispies.
Step 3: Mix in the Cereal
Once the chocolate mixture is smooth and melted, remove it from the heat and stir in the Rice Krispies cereal. Mix gently, making sure the cereal is evenly coated with the chocolate mixture. If you like, you can also fold in mini marshmallows at this stage for extra fluffiness.
Step 4: Add the Candy Ribbon Pieces
Fold in your candy ribbon pieces or colorful candies, saving a few to sprinkle on top for decoration. The candy will add sweetness and visual appeal, giving your bars a festive touch.
Step 5: Press into the Pan
Transfer the mixture into the prepared pan and use a spatula to press it down firmly into an even layer. Be careful not to press too hard, as you don’t want to crush the Rice Krispies too much.
Step 6: Chill and Set
Place the pan in the refrigerator and let the bars chill for at least 1-2 hours, or until the mixture has fully set and is firm to the touch. The bars will become more solid and easier to cut after chilling.
Step 7: Slice and Serve
Once set, remove the pan from the fridge and use the parchment paper to lift the bars out of the pan. Cut the bars into squares or rectangles, depending on your desired serving size. They’re now ready to enjoy!
Tips for Making Perfect Candy Ribbon Crunch Bars
- Let the Bars Cool Completely: If you try to cut the bars before they’re fully chilled, they might fall apart. Be patient and give them time to cool completely so you get nice, clean cuts.
- Customize the Candy: The beauty of this recipe is that you can use any candy you like! If you’re making these for a themed party or holiday, consider using candy that matches the color scheme, such as red and green for Christmas or pastel candies for Easter.
- Add a Twist: For a more decadent treat, try adding a layer of melted chocolate on top after the bars are set in the pan. You can also sprinkle crushed nuts like peanuts or almonds for an extra crunch.
- Keep Them Fresh: Store the bars in an airtight container at room temperature for up to a week, or keep them in the refrigerator if you prefer a firmer texture.
Why These Candy Ribbon Crunch Bars Are Perfect for Any Occasion
Candy Ribbon Crunch Bars are the ultimate treat for celebrations and everyday snacking. Whether you’re making them for a birthday, holiday, or just to satisfy a sweet tooth, these bars are guaranteed to delight. Their fun colors and delicious, crunchy texture make them a hit with kids, while the simple ingredients make them an easy dessert for any home baker.
From classroom parties to family gatherings, these bars can be customized to fit any event and are sure to be a crowd-pleaser. And since they are no-bake, they’re perfect for last-minute dessert ideas when you need to whip something up quickly.
Final Thoughts
If you’re in the mood for a sweet and satisfying treat that’s simple to make and fun to eat, Candy Ribbon Crunch Bars are the perfect choice. With just a few ingredients and minimal effort, you can create a delicious and colorful dessert that everyone will love. Plus, the best part is that you can customize them however you like, making them suitable for any occasion!
So next time you’re looking to make a fun and festive dessert, reach for this easy recipe and enjoy the perfect balance of crunch, sweetness, and color!
ADVERTISEMENT
ADVERTISEMENT
