ADVERTISEMENT
How to Tackle Black Mold on Refrigerator Gaskets: A Complete Guide
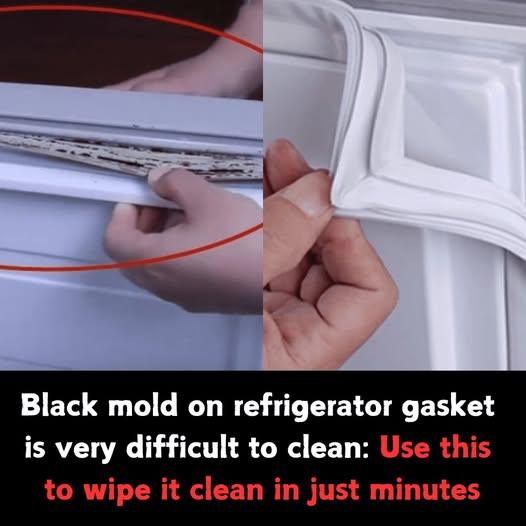
Black mold on refrigerator gaskets is a common but frustrating problem that many homeowners face. Gaskets are the rubber seals that help keep the cold air inside the fridge, but over time, they can accumulate moisture and become a breeding ground for mold and mildew. If not cleaned properly, this mold can spread and affect the air quality in your kitchen and even the freshness of your food. Here’s how to effectively clean black mold from your refrigerator gasket and prevent it from returning.
Why Does Mold Grow on Refrigerator Gaskets?
Mold thrives in damp, warm environments, and your refrigerator gasket provides the perfect conditions. Moisture from spills, humidity in the air, and even condensation from the fridge’s cooling system can collect around the gasket. When the gasket doesn’t seal properly or if the refrigerator door is left open too frequently, it can trap moisture, creating an ideal environment for black mold to grow.
Materials You’ll Need:
Before you start cleaning, gather the following supplies:
- Baking soda
- White vinegar
- Hydrogen peroxide (3%)
- Dish soap (preferably mild)
- A soft-bristled brush or old toothbrush
- Microfiber cloths or paper towels
- Rubber gloves (optional but recommended)
Step-by-Step Guide to Cleaning Black Mold from Refrigerator Gaskets
- Unplug the Refrigerator and Empty It Out Safety first: always unplug the refrigerator before cleaning, especially if you are using any liquids. Empty the fridge of any food to avoid contamination or mess. If there’s a lot of food inside, consider transferring it to a cooler to maintain its freshness.
- Inspect the Gasket Carefully inspect the refrigerator gasket for any visible mold or mildew. Pay attention to areas where the gasket meets the fridge and the door, as this is where moisture tends to build up the most.
- Clean with a Baking Soda Paste
- Mix a paste using baking soda and water (about 1 tablespoon of baking soda with 1 cup of water).
- Apply the paste to the moldy areas of the gasket using a microfiber cloth or your fingers (wear gloves if you prefer).
- Gently scrub the affected areas with a soft-bristled brush. The abrasive nature of the baking soda helps lift the mold without damaging the rubber gasket.
- Once you’ve scrubbed away the mold, wipe away the paste using a clean, damp cloth.
- Apply White Vinegar White vinegar is a natural mold killer and is safe to use on the rubber gasket. After cleaning the gasket with the baking soda paste:
- Spray undiluted white vinegar directly onto the moldy spots.
- Let the vinegar sit for about 10-15 minutes. You may notice the vinegar bubbling as it interacts with the mold.
- Wipe off the vinegar with a clean cloth or sponge. The vinegar will disinfect and help prevent mold regrowth.
- Hydrogen Peroxide for Stubborn Mold If any mold remains after the vinegar treatment, hydrogen peroxide can be an effective next step:
- Pour 3% hydrogen peroxide into a spray bottle and spray it onto the moldy areas.
- Let the solution sit for 10-15 minutes.
- Scrub again with your brush, focusing on any tough spots.
- Wipe away the excess hydrogen peroxide with a cloth.
- Dry the Gasket Thoroughly Mold thrives in moist environments, so it’s essential to dry the gasket completely after cleaning. Use a dry cloth to wipe off any remaining moisture. Make sure the gasket is completely dry to prevent future mold growth.
- Check the Seal Once cleaned, check the refrigerator door’s seal. Close the door and observe if the gasket is fully sealing the fridge. If you notice any gaps or tears, it might be time to replace the gasket. A faulty gasket can lead to more mold buildup, reduced cooling efficiency, and higher energy consumption.
For Complete Cooking STEPS Please Head On Over To Next Page Or Open button (>) and don’t forget to SHARE with your Facebook friends
ADVERTISEMENT
ADVERTISEMENT
