ADVERTISEMENT
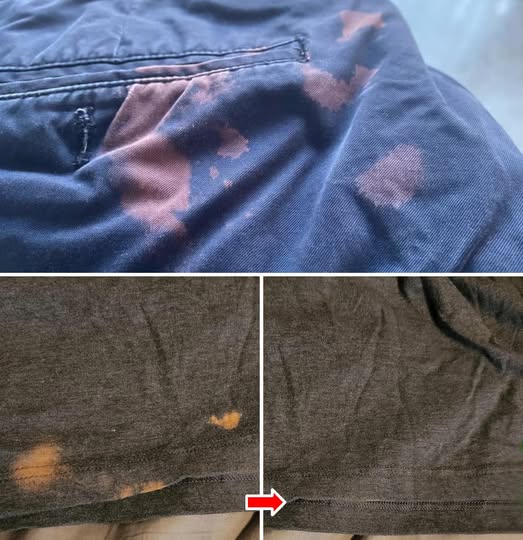
Trick 2: Create a Bleach Art Design
Turn the stain into a creative design by using more bleach to create patterns or a deliberate faded effect.
What You’ll Need:
- Bleach (diluted with water in a 1:1 ratio)
- A small sponge or paintbrush
- Stencils (optional, for patterns)
- Rubber gloves
- Plastic sheet or cardboard (to protect surfaces)
Steps:
- Prepare the Garment: Lay the garment flat on a protected surface. Insert a plastic sheet or cardboard between layers of fabric to prevent the bleach from seeping through.
- Apply Bleach: Use a sponge or paintbrush to apply diluted bleach to the area around the stain. You can freehand a design or use stencils for precision.
- Blend the Stain: If you’re blending, feather the edges of the stain into the design for a seamless look.
- Rinse Thoroughly: Once the bleach has achieved the desired effect, rinse the garment thoroughly with cold water to stop the bleaching process.
- Wash and Dry: Wash the garment separately on a gentle cycle and air dry.
Pro Tip: Experiment on an inconspicuous area or a similar fabric scrap before applying bleach to your garment.
Additional Tips:
- Avoid Future Stains: Be careful when using bleach and always dilute it. Wear old clothes when working with bleach.
- Consider Fabric Markers: Fabric markers are a quick and easy way to touch up small bleach stains. They come in a variety of colors and are great for spot fixes.
- Repurpose: If the damage is beyond repair, consider upcycling the garment into rags, a tote bag, or even a patchwork project.
Bleach stains don’t have to spell disaster. With these DIY tricks, you can reclaim your clothes and even create unique, personalized designs in the process. Give these methods a try and see your wardrobe transformed!
ADVERTISEMENT
ADVERTISEMENT
